MS Word: How to Change Heading Numbering to Start on a Different Number – set a custom start number for your outline
Here is a quick tutorial on how to set a custom start number for your headings in Microsoft Word. Often you find the need to do this when you split your chapters into separate Word documents. The heading numbering for second and subsequent chapters will need a custom start to coincide with the chapter numbers.
Set a Different Start Number for Your Outline
By default, when starting a new numbered heading in a new document, this will start from 1. This is assuming that you have applied Outline Numbering to your headings. Be sure to pick the right heading level (Heading 1, 2 and so on). To set a different starting number, use the following steps:
1. Bullets and Numbering
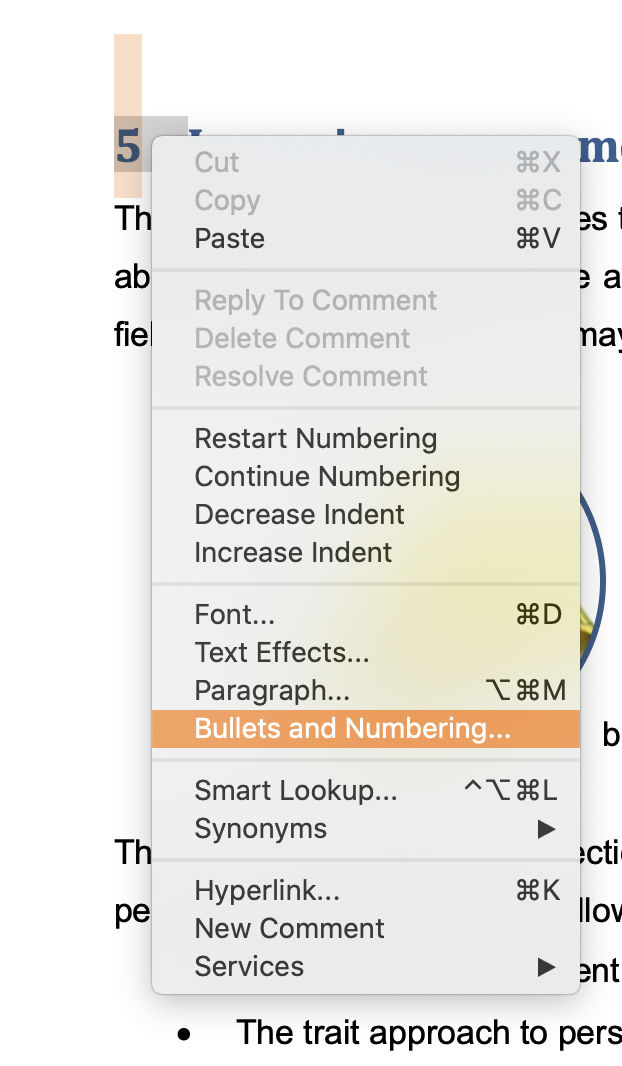
Right click on the number next to the heading and click on Bullets and Numbering… from the pop-up menu.
2. Customise Bullets and Numbering
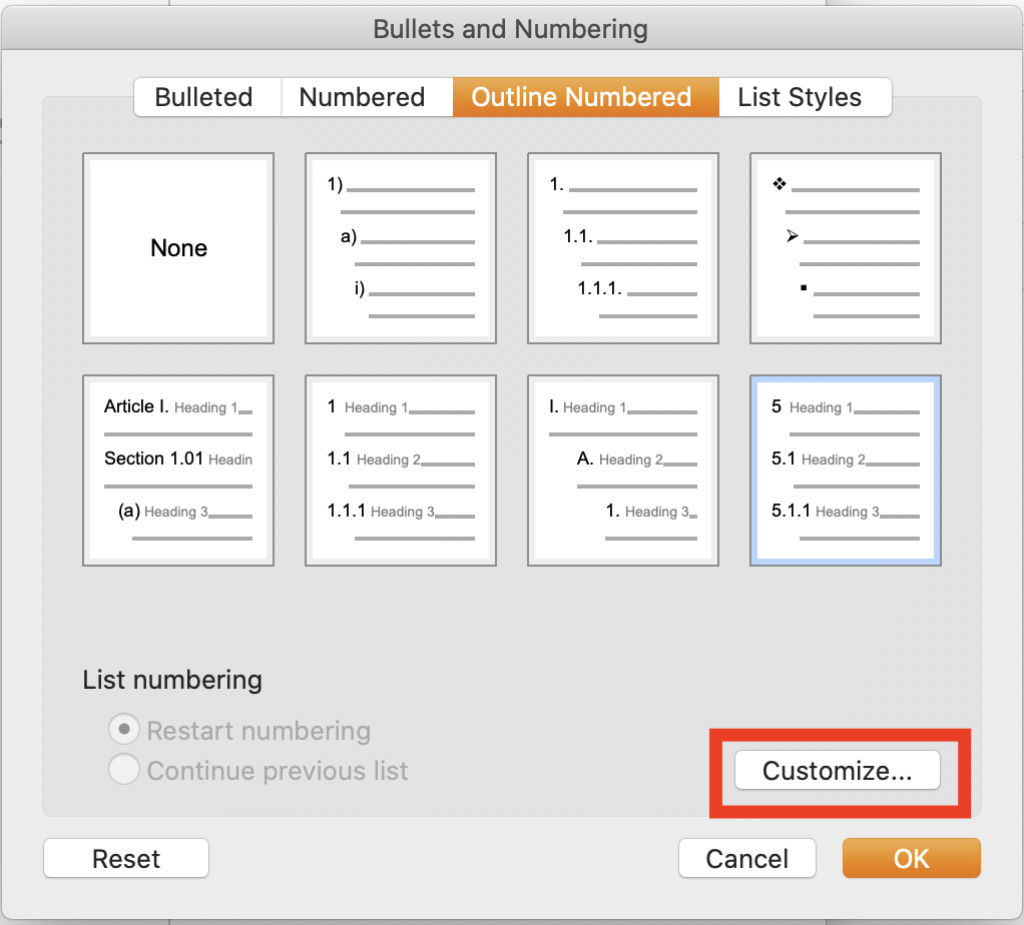
In the next window, click on the Customize… button
3. Customise Outline Numbered List
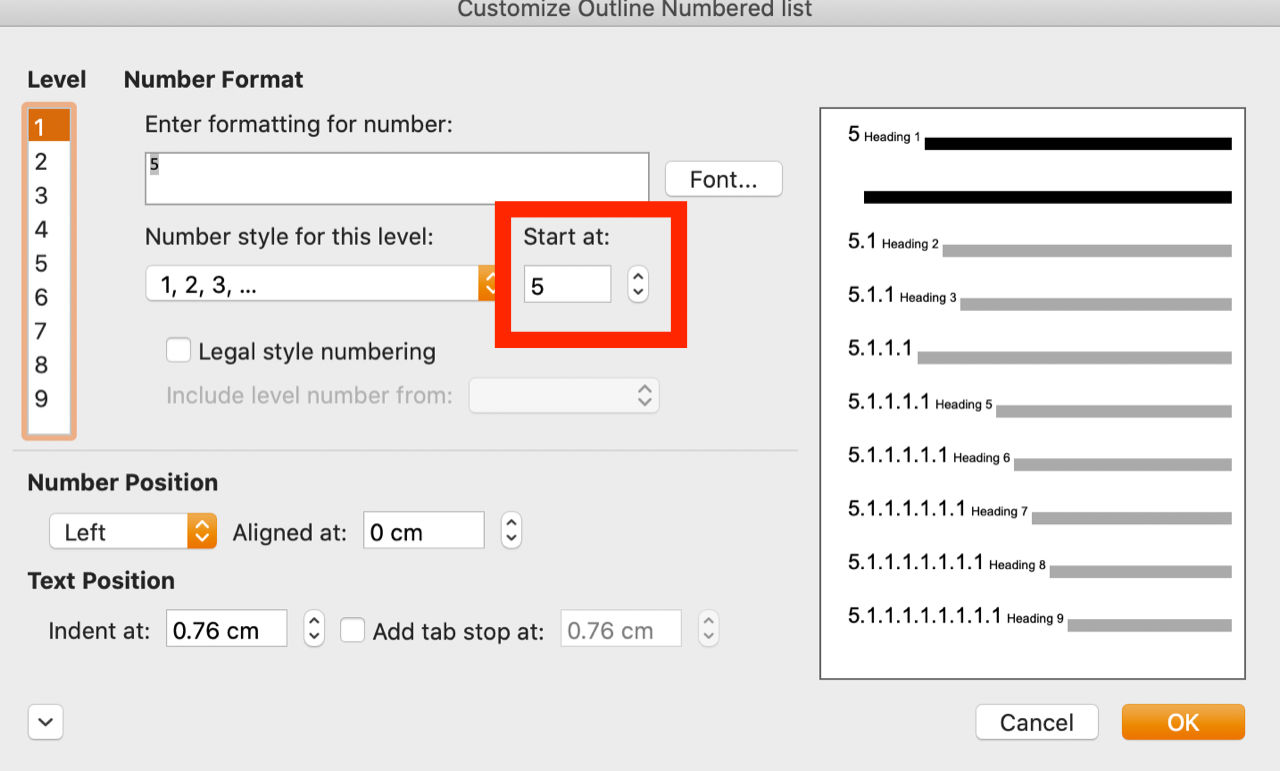
Finally, choose the start number using the Start at: field and when you are ready click on the OK button to confirm. Here is also where you decide on the numbering Level for your heading.
Once confirmed, your numbering will start with your custom number and follow on from there.

14 January 2023 @ 1:50 am
I have been looking for this solution for a decade! Thank you!!