Ensuring that Your Featured Image in WordPress Post is Accessible
Most of us pay little attention to the accessibility of the featured images. We focus more on the images we insert into the post or page, but would just set or let the theme automatically set the first image in our post as featured image. In order to ensure that your featured image is accessible, follow the easy steps in this tutorial.
Why it is Important to Set a Featured Image
Setting a featured image in WordPress plays a critical role in enhancing the visual appeal, adding accessibility and functionality of a website. A featured image, often referred to as a post thumbnail, serves as the primary visual representation of a content, such as a post or page on a WordPress site. This image is crucial for several reasons, both from a user engagement and technical SEO perspective.
- provides a visual preview of the content, helping to grab attention and encourage clicks.
- help in creating a cohesive and attractive look across the website, enhancing the overall user experience and branding. They ensure consistency in design and layout, making the site more professional and easier to navigate.
- play a vital role in search engine optimization (SEO). When articles are shared on social media platforms, the featured image is typically displayed, making the content more appealing and shareable, thereby increasing its reach and potential for engagement.
- properly optimised images (with alt tags and descriptive filenames) can also contribute to a site’s SEO and accessibility, improving its ranking in image search results and usability of the site.
- optimised correctly, featured image can improve the loading time of a page, contribution to better site performance and user experience.
Automatic Feature Image Assignment
Some theme or theming framework automatically assigns the first image used in the body of the post as the featured image if one is not assigned by the user. While this is better than nothing, it is like leaving all the benefits of setting a feature image we discussed earlier to chance. Not assigning an attractive and optimised image for your post means you lose out on user engagement, accessibility and Search Engine Optimisation.
Making Your Featured Image Accessibility Compliant
Accessibility compliance for images primarily revolves around ensuring that the content is perceivable and understandable to users who rely on assistive technologies, such as screen readers. Use the following to enhance the accessibility of your featured images
- Provide a meaningful alternative text (alt text) for each image. Alt text is a concise description of the image content and context, which assistive technologies can read aloud to users who cannot see the images. This description should convey the same message or function that the image does within the post. When setting a featured image in WordPress, you can easily add alt text in the image settings. Ensure that the alt text is descriptive and relevant, avoiding generic descriptions like “image of…” or “photo of…”.
- Consider the technical aspects of your featured image to ensure it does not hinder the website’s accessibility. This includes optimising the image for fast loading times, as slow-loading images can disrupt the user experience, especially for people using screen readers. Do not upload an image you downloaded from your smartphone or camera without first resizing it to make it suitable for web.
- Ensure that the image’s contrast ratio is high enough to be distinguishable by users with visual impairments. If there is text on the image, use a text on background image compliance checker. Other text (foreground) on background colour checker tools can be found at the bottom of this post.
- When sharing an image with text other than a logo, ensure that the same textual information is available in the alt text. If this is too long, ensure that the full text is available in the adjacent text in the post or page itself. Example is when sharing an image of a leaflet, brochure, book cover or poster.
- When sharing an informative image such as graph, table and infographics, again make sure that the information is available in the alt text and that the full description of the data is available in the adjacent text in the post or page itself.
Step-by-Step to Make Your Featured Image Accessible
First, give your image file a meaningful name e.g. Job Fair Leaflet.jpg, Construction Careers Event Flyer.jpg or Youth Environmental Group Poster.jpg. Login to WordPress and go to the Dashboard.
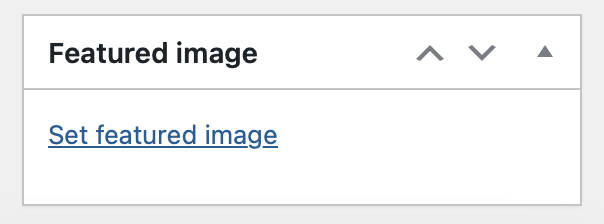
- Click on Posts > Add a New Post in the left sidebar
- In the post’s right sidebar, under Featured image, click Set featured image (screenshot above)
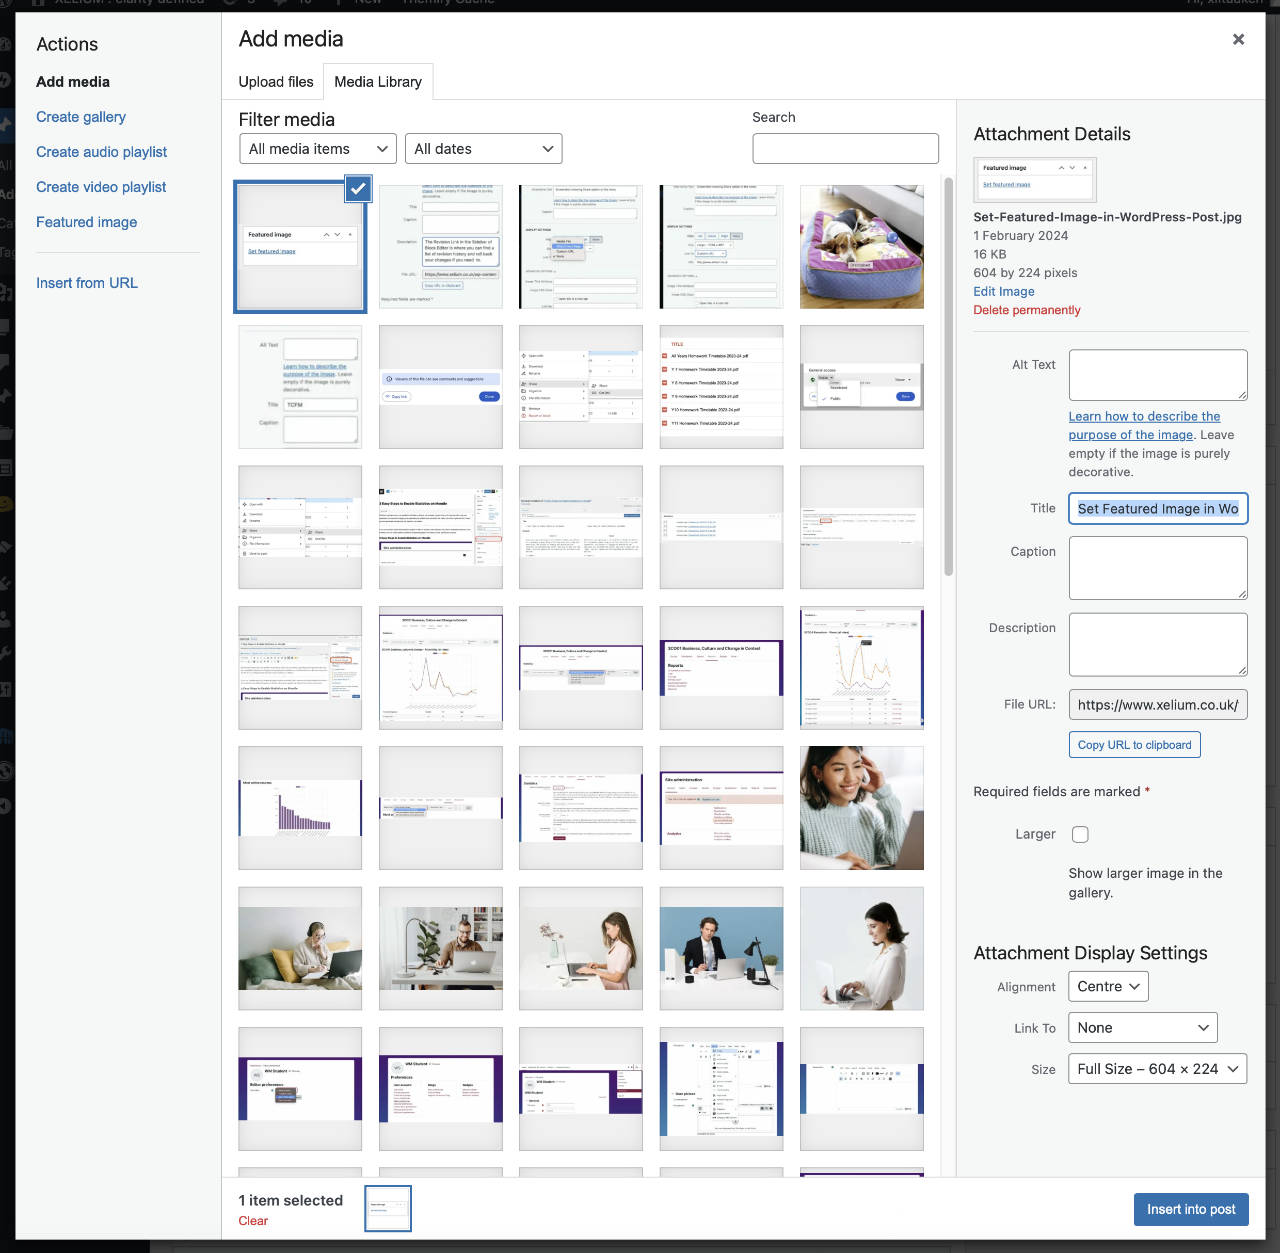
- Here, you can choose an existing image you have uploaded in the Media Library or click the Upload file tab to upload a new image.
- Either options brings you to the Add media’s Media Library tab pop-up window, showing the attachment image details in the right column (screenshot below)
- By default the image name is appended to the Title field. Remove this as it is redundant and not used by screen readers. You can cut and paste this into the Alt Text field and update the alt text to describe the image or its function.
- Optional: You can also add text in the Description field which will appear only in the image attachment page, and add text in the Caption field which will appear at the bottom of the image when inserted in the body of post. Both Description and Caption are optional and do not add to accessibility.
- When ready, click Set featured image button at the bottom right corner.
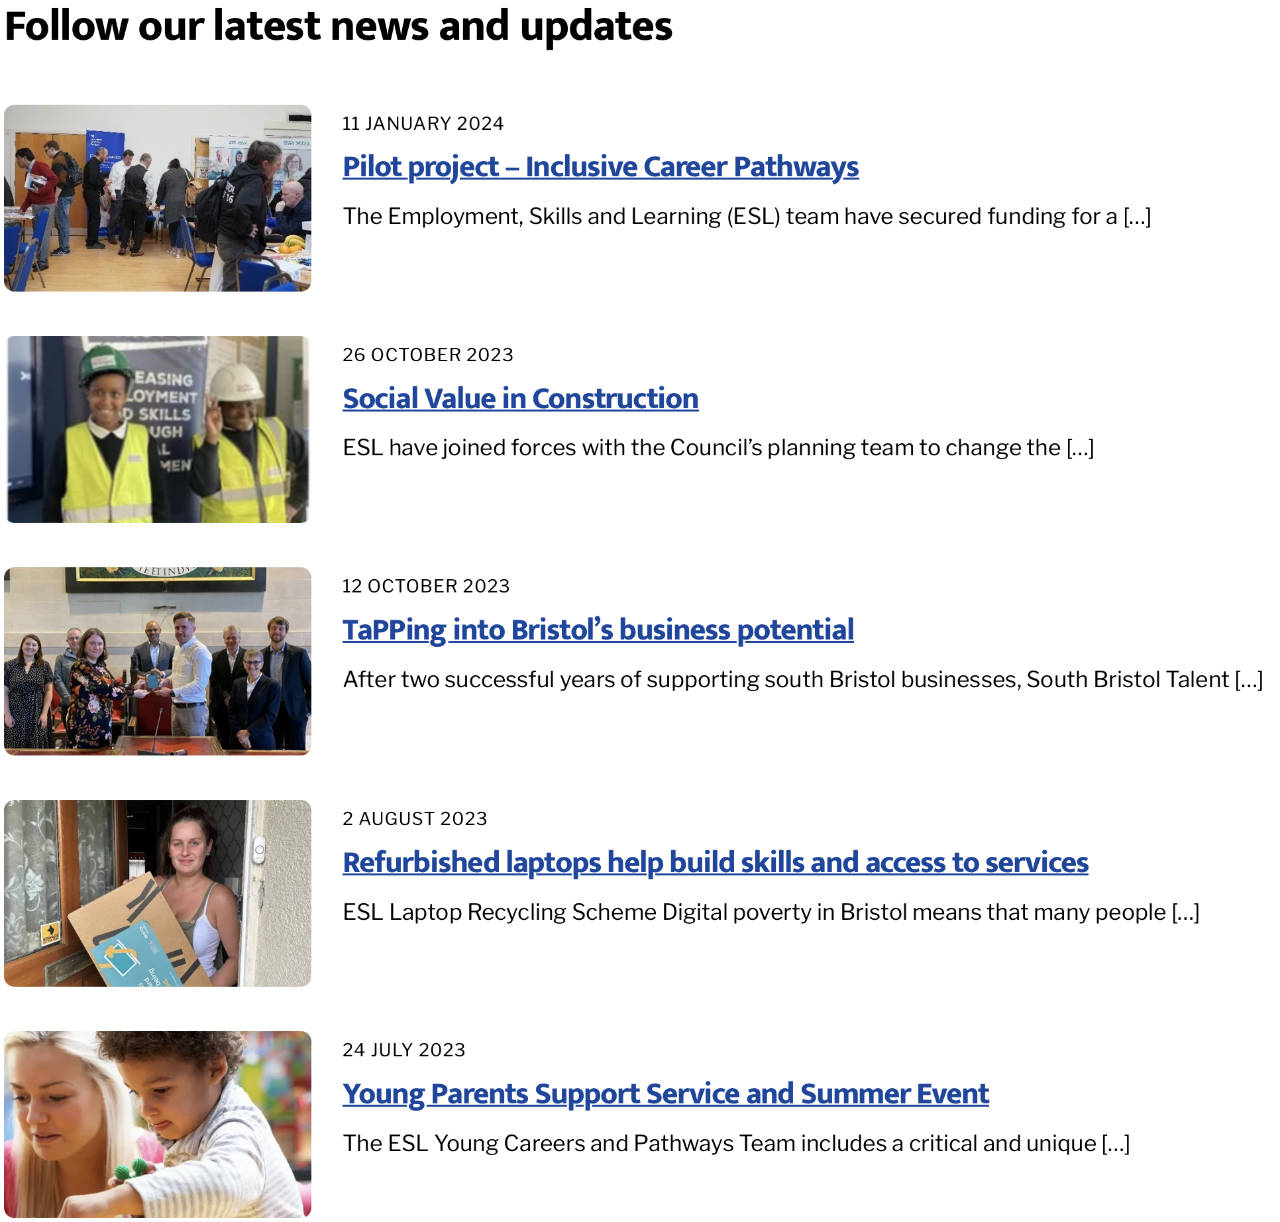
The assigned featured image will now show in the post and post list page (see screenshot below) when you publish your article. Two rules to follow depending on how to the image is used:
- As a functional image i.e. a link to the post: the alt text of the image needs to say where it is going e.g. Pilot project – inclusive career pathways.
- As an informative image: the alt text of the image needs to describe the image especially if not already described in adjacent text e.g. Young adults and parents at a careers event.
Making the thumbnail clickable next to the title link can cause a post list page to have redundant links. Disabling the featured image link means you will be required to describe the image in the Alt text field.
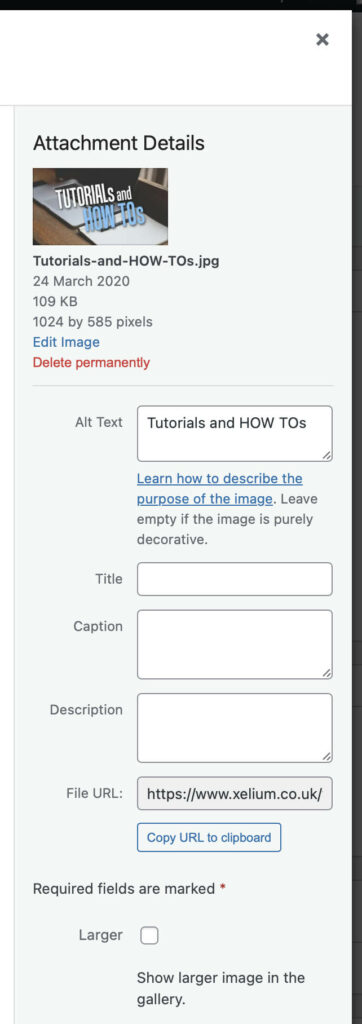
IMPORTANT: if in doubt, remove the Title field of an image as this is redundant and describe the image in the Alt text field. You can go back to the featured image you inserted by clicking on the featured image thumbnail in the post editors page right sidebar. This opens the image attachment details (screenshot below) so you can edit the Title and Alt Text fields there.
Final Thoughts
By focusing on meaningful alt text and technical optimization, you can make your WordPress featured images more accessible. This not only improves the experience for users with disabilities but also aligns with web accessibility standards, making your site more inclusive and potentially enhancing its SEO performance. Remember, accessibility is an ongoing commitment, so continuously reviewing and updating your content for compliance is key to maintaining an accessible website.
Useful Tools
Contrast Checkers
- WebAIM Contrast Checker
- Colour Contrast Checker
- WCAG – Contrast Checker
- Venngage WCAG Color Contrast Checker
- Accessible Web WCAG Color Contrast Checker
Image Compliance Checker
