How to Add Quick Jump Links (Tabs) to Moodle Courses
One of the many ways to organise your courses to avoid the scroll of death is to turn on the “Show one section per page” course layout in course settings. However this creates a different challenge to students in terms of navigation. Here’s how to add custom quick jump links to your course for ease of navigation.

Pre-requisite: Show One Section Per Page” Layout
Our tutorial assumes that you are using “Show one section per page” layout for your course.
If not, follow the steps to do this in our How to avoid Scroll of Death in Moodle Course Area tutorial.
You can then come back here for the codes to create your own links.
Links to Sections in a Moodle Course Area
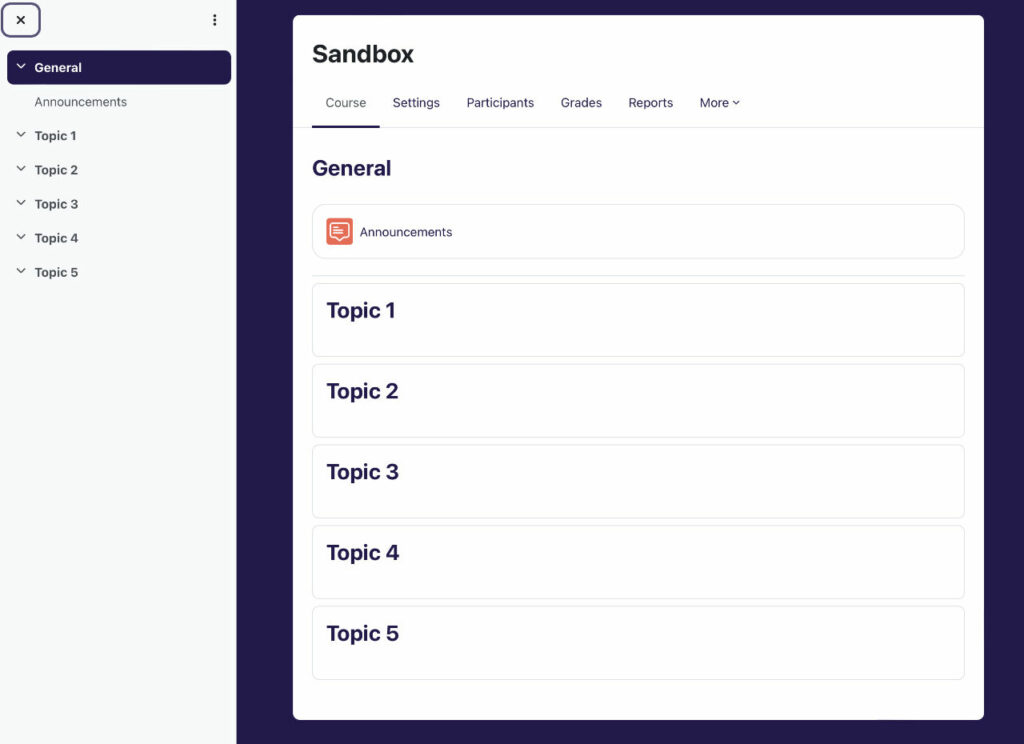
Use the following steps to quickly add your own custom quick jump links to any course areas. Here is your typical course area if Topics format is chosen, see image below. It consists of a General (Topic 0) section and the following sections, Topic 1, 2, 3 etc.

Before we go any further, it is worth considering how these sections are linked. The course will have a course ID so the link to our course will appear like below:
https://mymoodle.com/course/view.php?id=n
where n is a number that represents your course assigned on creation of the course.
You can find your course ID in the browser’s address bar when visiting the course.
For each section, an extra code, “§ion=x” is appended to the end of the course link
https://mymoodle.com.com/course/view.php?id=n§ion=x
where n is a number that represents your course assigned on creation of the course and x is the section (Topic) number e.g. 1, 2, 3, 4 and so on.
General of Topic 0
The very first section is called Section=0 (zero). This is labelled by default as “General”. I call this Topic 0 (zero) in line with the numbering for the Topics. It uses the following link format:
https://mymoodle.com.com/course/view.php?id=n§ion=0
where 0 (zero) is the number for Topic 0
Add Custom Quick Jump Links to the General section
Now that we understand how the links are formatted, let’s jump right into creating the shortcut links. This will be added to Topic 0 (Section 0) or General and will appear across all pages of your course when using one section per page layout. One simply has to click on the topic links to go straight to the pages.

- Login as teacher with editing rights to your course and turn edit mode on.
- Click on the context button (three dots) next to the first section labelled General then click Edit section from drop down menu(image below).
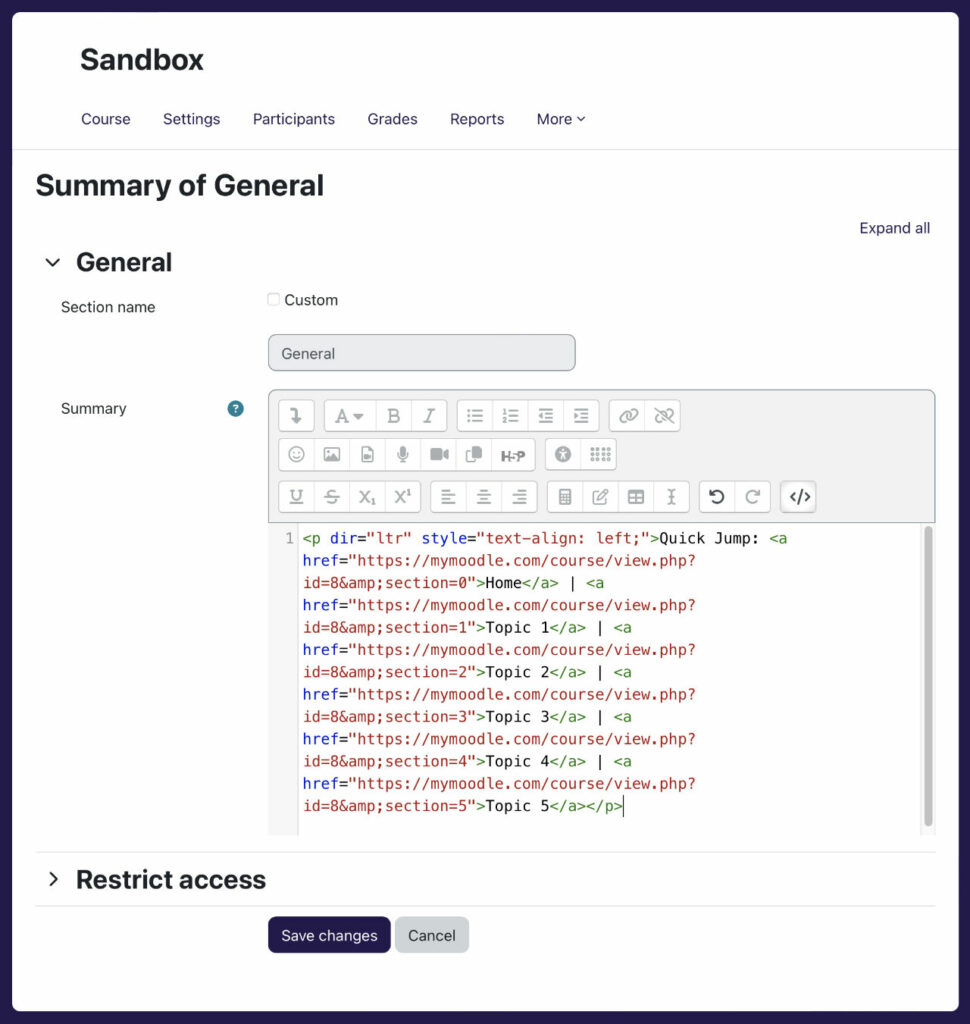
- In the Summary editor window, click the button to expand the toolbar to release a third then click HTML button </> to toggle to code mode.
- Now paste the following lines, update the domain name and course id and click Save changes (image above).
<p dir="ltr" style="text-align: left;">Quick Jump: <a href="https://mymoodle.com/course/view.php?id=n&section=0">Home</a> | <a href="https://mymoodle.com/course/view.php?id=n&section=1">Topic 1</a> | <a href="https://mymoodle.com/course/view.php?id=n&section=2">Topic 2</a> | <a href="https://mymoodle.com/course/view.php?id=n&section=3">Topic 3</a> | <a href="https://mymoodle.com/course/view.php?id=n&section=4">Topic 4</a> | <a href="https://mymoodle.com/course/view.php?id=n&section=5">Topic 5</a></p>
Remember to change mymoodle.com to your Moodle’s domain and course id, n to your own course id number. You can also copy and paste a line to add more topic links.
If you want, you can change the link label “Topic 1, Topic 2, Topic 3” etc to your actual topic titles. This can be achieved within the HTML code edit above or in normal text editor mode (click HTML button </> to toggle back).
Just remember to click Save changes when you are done.

