How to Restrict Assignment to a Group in Moodle
There are several scenarios where this may be applicable. First, to create an assignment but to restrict this to only a group of students in the course. Second, to create multiple assignments, one for each group or competency level and restrict them accordingly. Here’s how to restrict assignment activity to a group in Moodle.
Need to limit access to assignments based on groups on Moodle? You have come to the right place.
What are Groups in Moodle
You may skip this section if you are already familiar with groups. Groups in a Course is an easy way to split up large cohort of students. These can be into their classes in a year group, into smaller groups within a class based on capabilities or simply so that you can assign them different activities, resources or entire topic section. Here are some scenarios where Groups may be useful:
- A teacher or teachers teaching in several classes and wish to filter activities and gradebook to only see one class at a time.
- A teacher sharing a course with other teachers and wishes to filter activities and gradebook to not see the students from their colleagues’ classes.
- You wish to allocate a particular activity, resource or topic section to just one class or set of users and you don’t want others to see it.
It is worth understanding the basics of groups to better make use of them in your course:
Group levels
There are two levels where you can assign groups, Course level or Activity level. To use groups, you need to first set a group mode (explained in the next section) within the course.
- To set Group mode in a course, go to Administration > Course administration > Edit settings then under Groups, change Group mode from No groups to either Separate groups or Visible groups (more below).
- Each activity that supports groups can also have its own group mode defined. This is only available if “Force group mode” in Groups settings under course settings is set to “No”. If set to “No” teachers may change the group mode.
Group Mode
There are three group modes in course settings:
- No groups – no subgroup is needed and everyone is part of a big community in the course
- Separate groups – each group can only see their own group, others are invisible
- Visible groups – each group works in their own group but can also see other groups (in read-only).
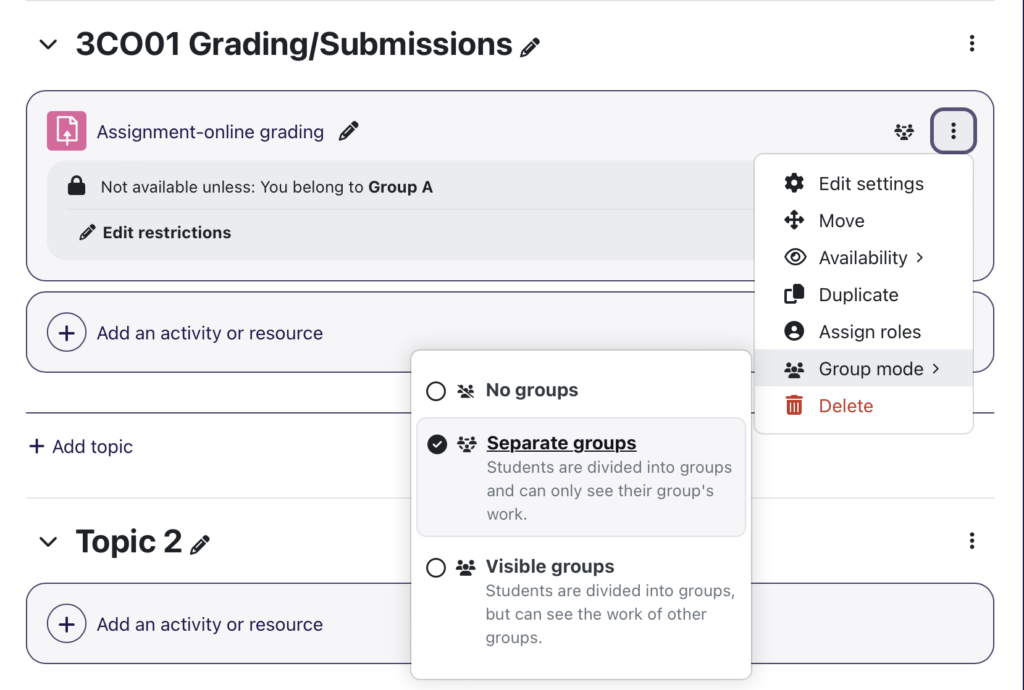
Here is a quick way to set group mode for an assignment in your course. Turn on edit mode then click on the context menu > Group mode followed by either Separate Groups or Visible Groups as defined earlier. See image below.

How to Restrict Assignment to a Group in Moodle
There are three main steps to achieve these. You can begin by first creating the assignment activity. Then, if you haven’t already created Group(s) in your Course, create this under and add students to your Group(s). You can then restrict an Assignment to a Group or Groups.
Overview
- Create an Assignment
- Create Group(s) in a Course and Add Students to Group(s)
- Restrict Assignment to Group(s)
Step 1: Creating an Assignment activity
To add a new Assignment activity, log into Moodle as a teacher with editing rights, go to the course and turn Edit mode on.
- Scroll to the topic you wish to create the Assignment under and click (+) Add an activity or resources
- From pop-up window, click Assignment
- On Adding a new Assignment page, complete Assignment name, activity instructions and any relevant settings. If you haven’t already created groups in your course, scroll down to the bottom and click Save and return to course for now. If you already have groups skip to Step 3.
Note: Do not let the many accordion tabs and settings intimidate you. If in doubt, go with default value.
Step 2: Creating Group(s) in a Course & Adding Students to the Group(s)

- Log in to Moodle as a Teacher with editing rights then go to the course
- Click on Participants in the top menu
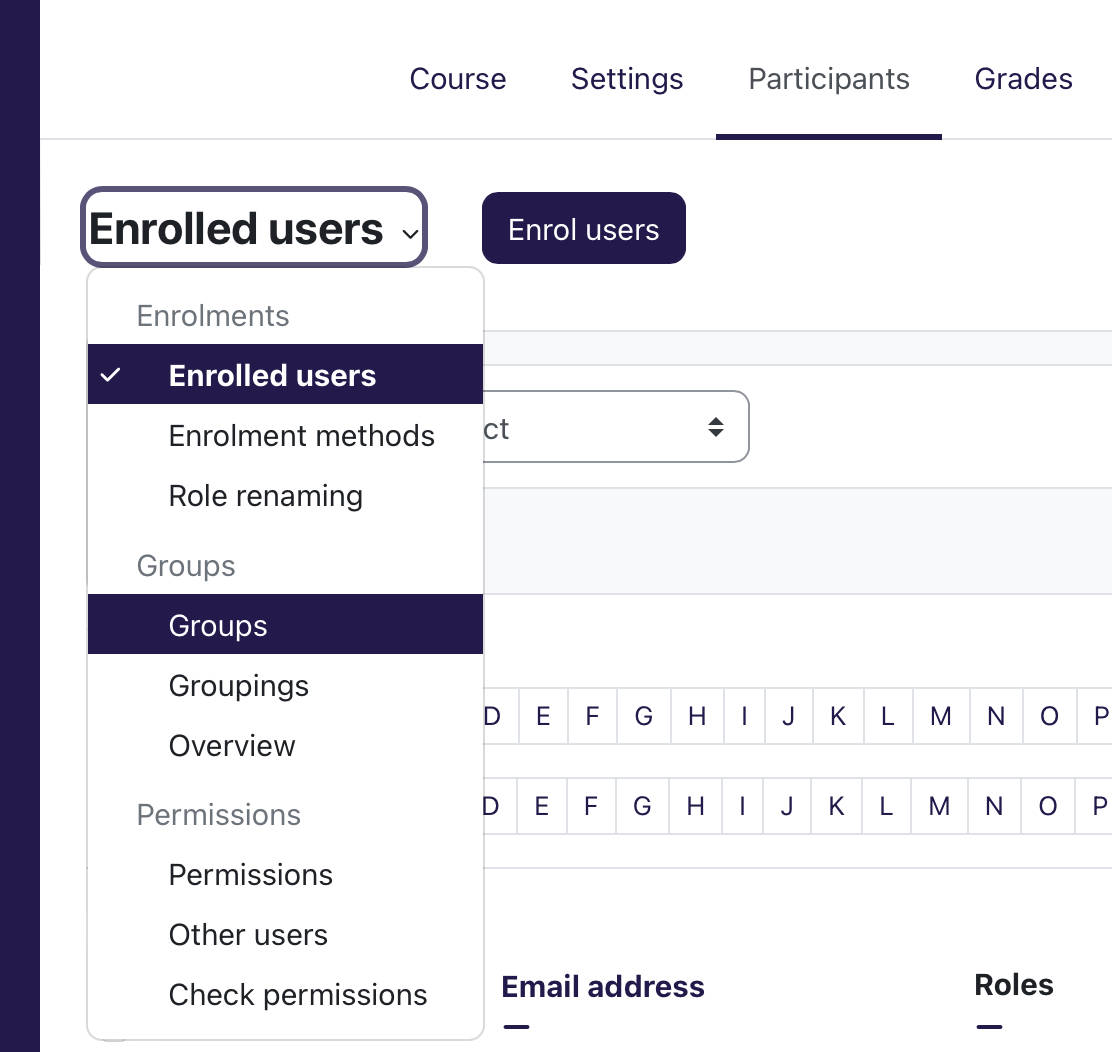
- From the drop down menu in the top left corner, switch from Enrolled users to Groups (image above)
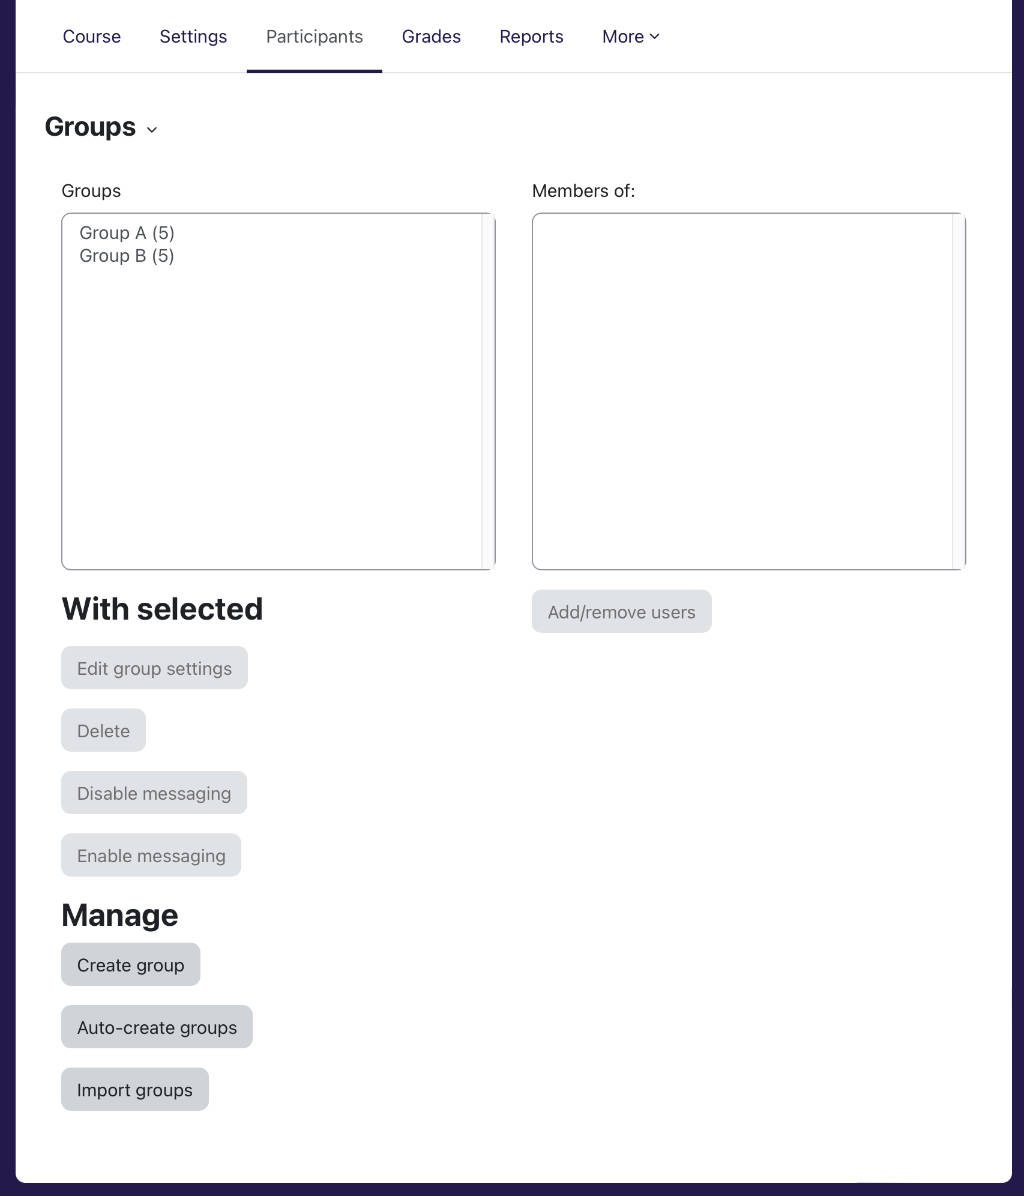
- In the Groups page, click Create group under Manage (image below)
- Add Group name e.g. Group A or Group B and click Save changes

You can now assign learners to the group.
- On the same Groups page, click to select the Group name you wish to assign students to in the left pane.
- You will see name of members in the right pane and their role (e.g. Student), click the Add/remove users button below the right pane.
- In the Add/remove users page, click on the name or names (holding down the CTRL button then click on names) in the Potential members list (right pane) or use the search field then click to select from search result. Then, click Add button to add to the Group members list (left pane).
You can do the reverse to remove a group member by clicking to select the Group members name in the left pane and click the Remove button to move it back to Potential members.
Step 3: Restrict Assignment to Group
Once you have done with Group creation and adding members to the group, you can now restrict the assignment to the group you have just created.

- Go back to the Course page
- Click on the Assignment you have just created
- Click on Settings
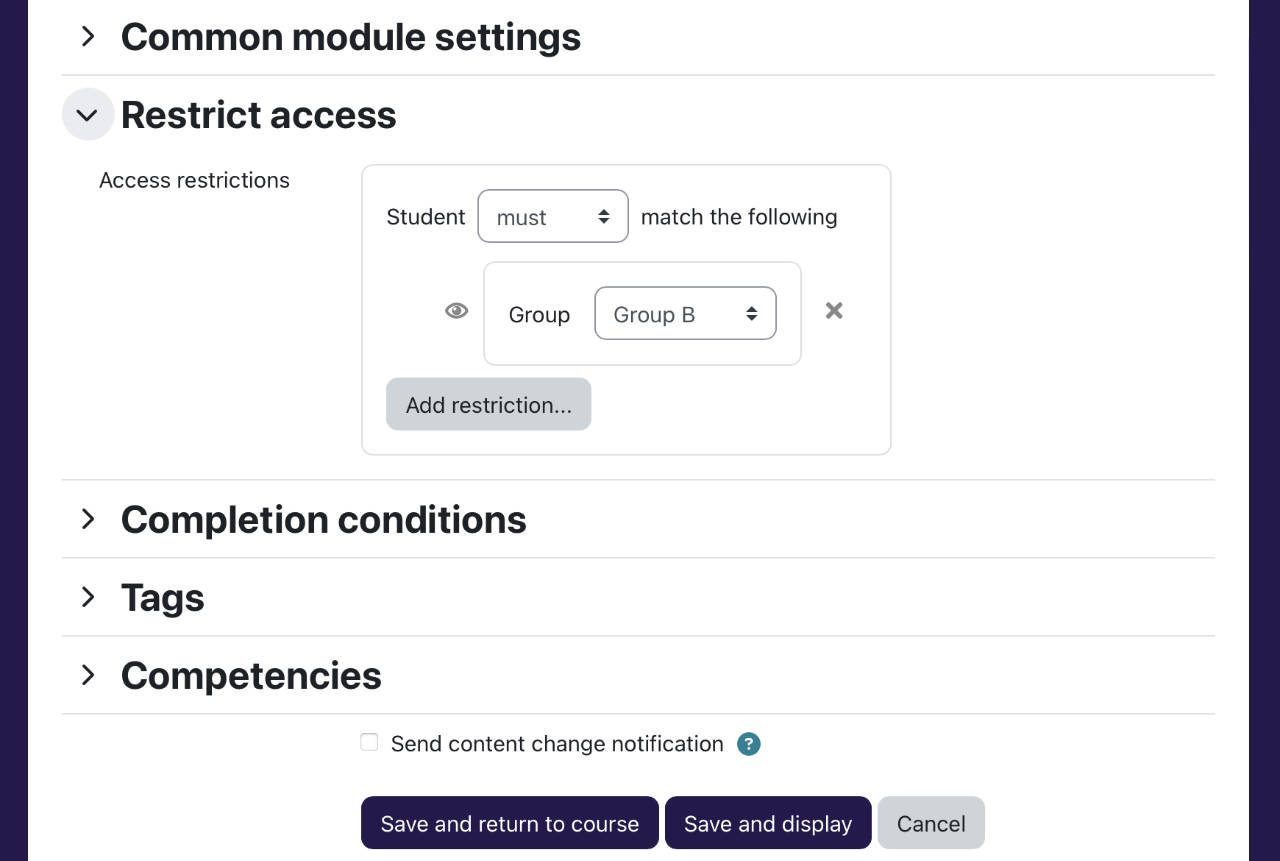
- Scroll down to Restrict access, click to expand then click Add restriction… button (image above)
- From Add restriction… pop-up click Group button
- Back on the Assignment settings page, click on Choose.. drop down field to choose a group you created earlier to access this Assignment activity.
- Click Save and return to course
Once set, this assignment will no longer be visible to other groups. You can add more Groups using the Add restriction… button again, add more groups.


