How to Clone or Copy a Course in Moodle
Duplicating or copying a course couldn’t be easier on Moodle. With a few clicks, you will have a perfect clone of your existing course. Here are the steps to copy or clone a course in Moodle.
There is a Better Way
Before we get carried away, you do need a strong use case to duplicate or clone a course as cloning increases the amount of data and storage demand on the server not to mention the administrative nightmare. Say you have 20 courses to be delivered to 5 different groups of users be it cohorts, classes or different methods of deliver. Your 10 courses might turn into 100 courses.
You can create multiple labels (text and media), resources and activities (assignments) for different groups in the same course. You can even dedicate an entire Topics to different groups. There is really no need to duplicate a course to cater to each group.
If you are looking to use the same course content for different groups or cohort of students whether they are in different classes or to provide different modes of delivery, Groups will let you do that without cloning the course. Plus, your teachers would just need to access one course to manage all the students in their respective groups, instead of going in and out of different course areas. And if a change were required across the course content, editing teachers too, would not need to go in and out of multiple courses to tweak the content for different groups.
You can use Groups and allow different groups to access different resources including text and media (labels) and assignments within the same course area to cater to:
- different classes or cohort
- different groups of students with different level of competencies
- different delivery or access modes such as online, on-demand, in-person, live online, fast track etc.
Different groups of students above will see slightly different content and assignments within the same course. While teachers can access all the different resources and assignments clearly labelled for each of the groups above in the same course area. You can even make an entire TOPIC (section) on the Course for each group.
Essentially our advice is that if you do not NEED to replicate a course, DON’T. It is far more efficient both for user and content administration and server resources to manage the Course area effectively and efficiently using Groups. We have more information on using Groups in Moodle in our earlier post.
However, if you are certain that you need to duplicate or clone a course, perhaps you’re retiring the old one or needing significant changes while the current course is still in use or maybe you have used ‘Course copy‘ and it has not worked, then we recommend cloning a course using the steps below.
Step-by-Step Guide to Clone a Course in Moodle
For a start, you will need Course Creator access to Moodle. Login to Moodle with your account. The steps can be further divided into two parts, to create a new course, then choose a course to import from.
A. Create a New Course

Add a new course using the steps below:
- Browse to the https://www.yourmoodle.com/course
- Click on More > Add a new course (screenshot above)
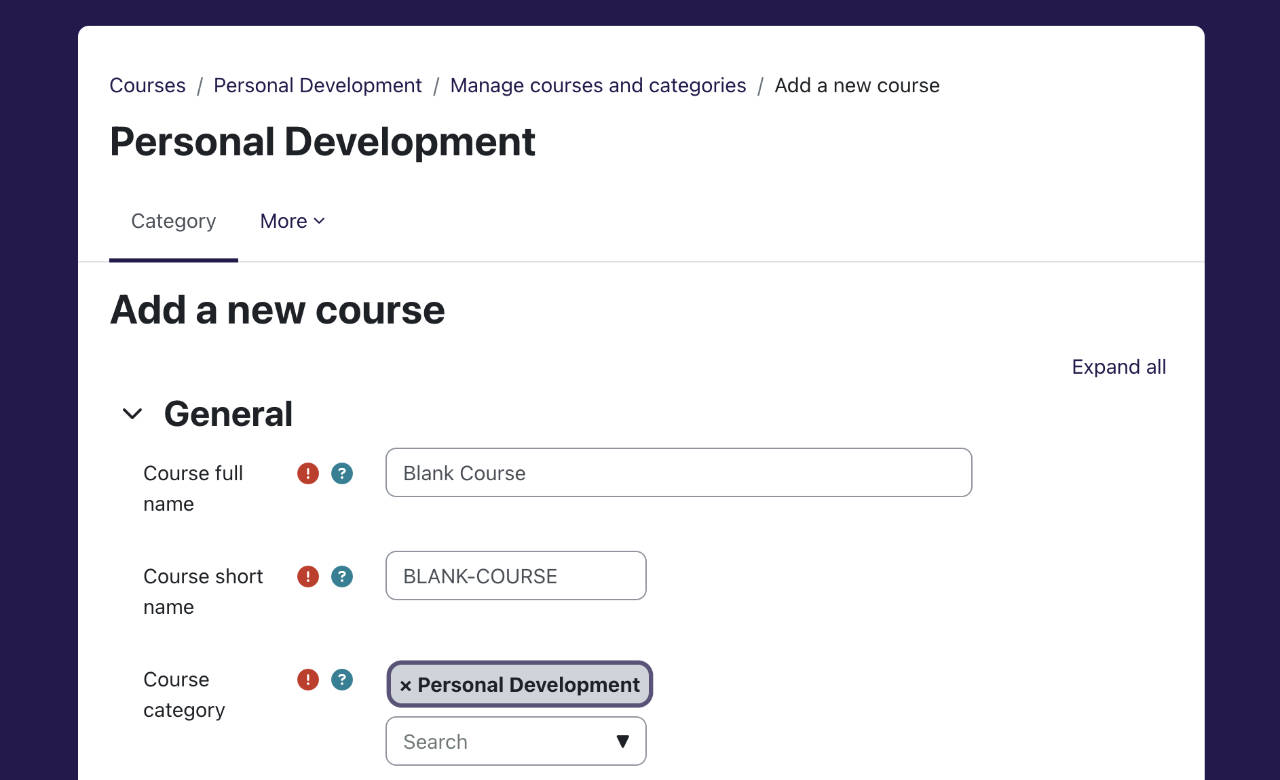
- Complete the Course full name, Course short name and select the Course category from the drop down list or search (screenshot below)
- Accept the default settings for now and scroll down to the bottom to click on Save and display
B. Import from an existing course
Now that you have a blank course in which to copy or clone an existing course into, use these steps:
- Access your new blank course you have just created using the steps above
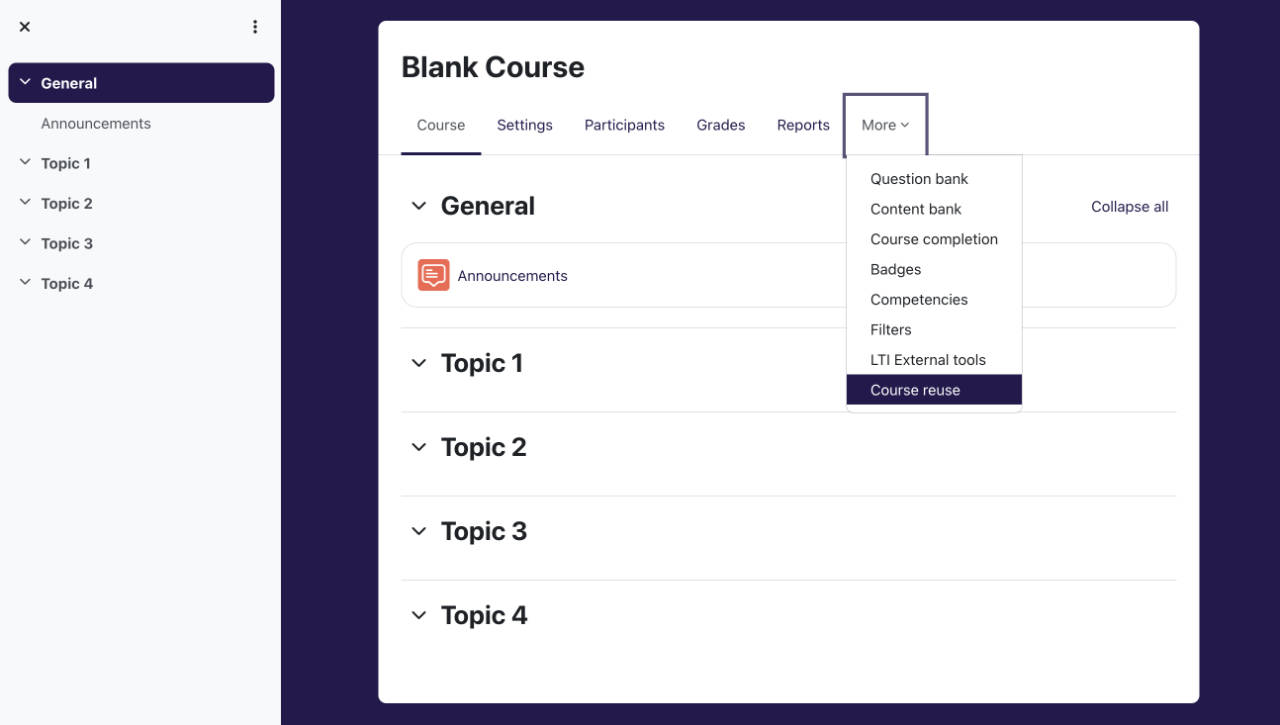
- From the Course navigation > More > Course Reuse
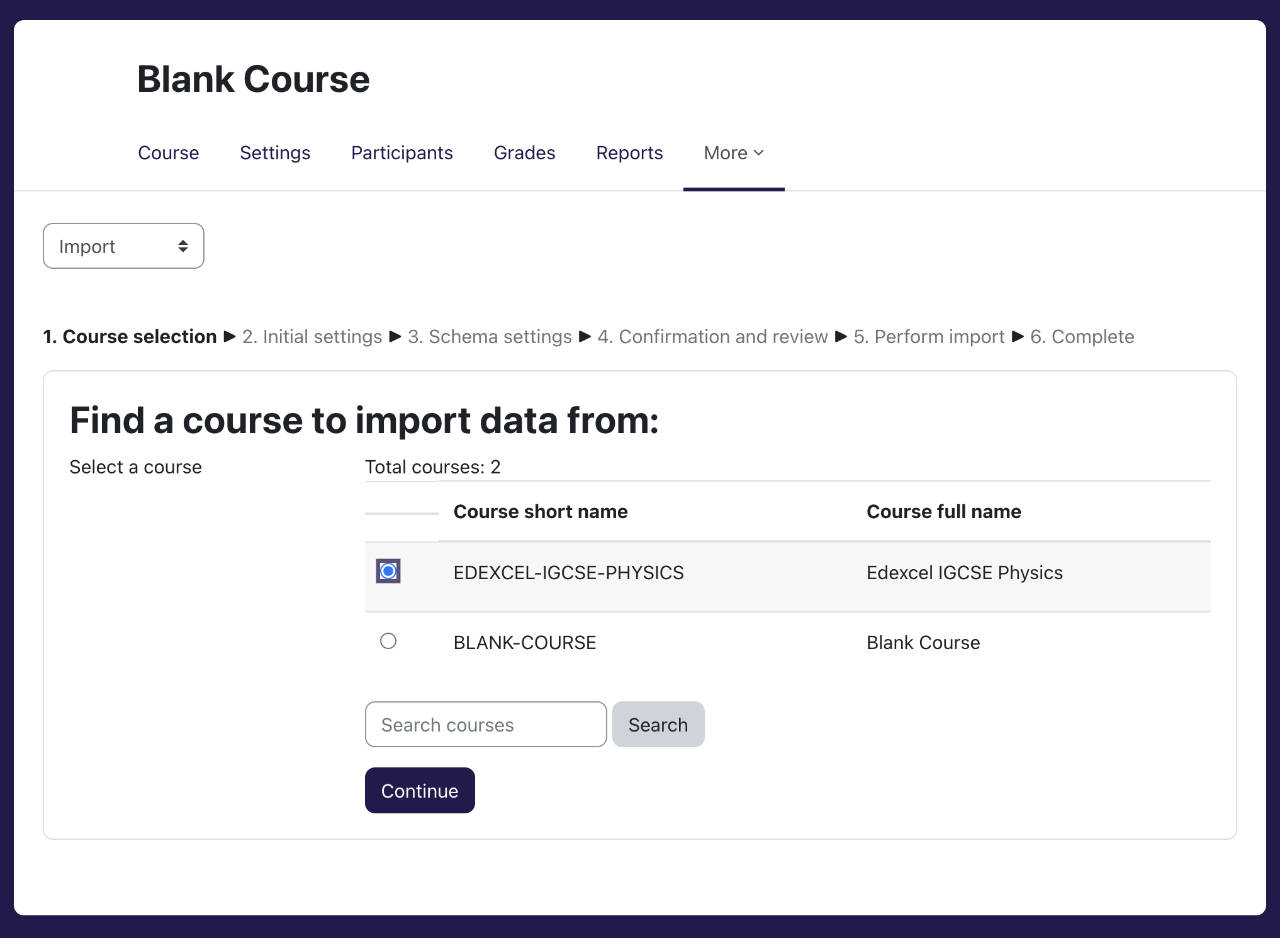
- In Find a course to import data from … pick from the list of courses OR search for the course you wish to import from, select it then click Continue. Note that you can only import from courses where you have been enrolled as a teacher.
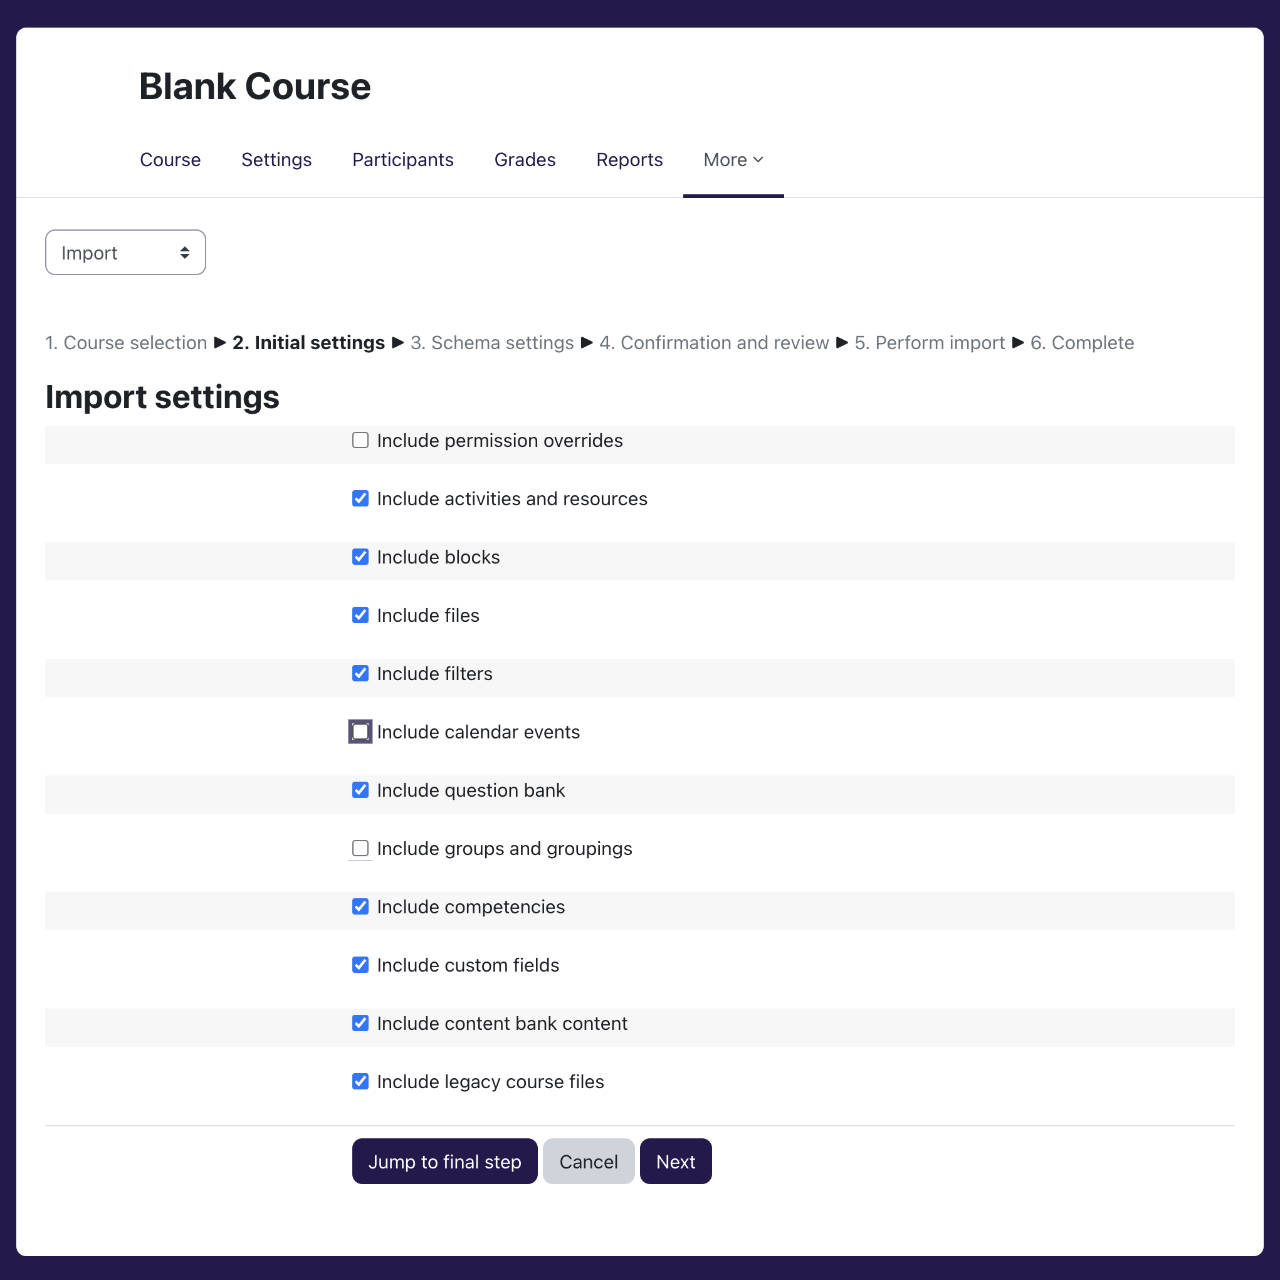
- In the Initial settings page, we recommend unticking “Include groups and groupings” then click Next
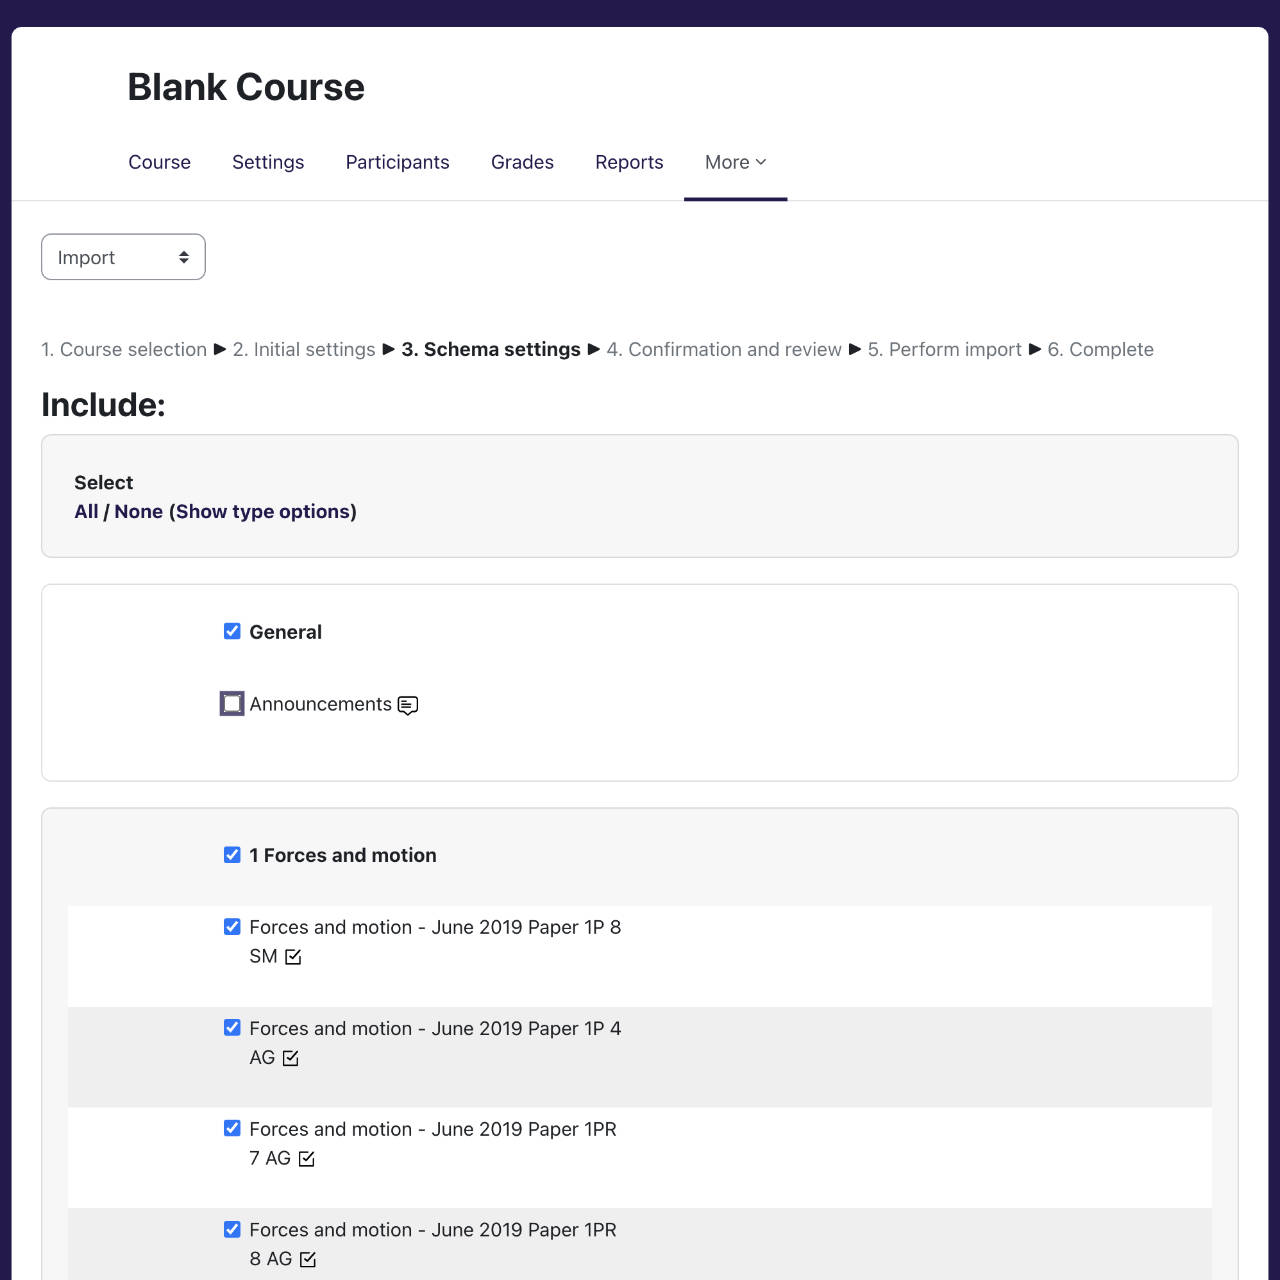
- In the Schema settings page, uncheck any resources or activities you do not need and click Next
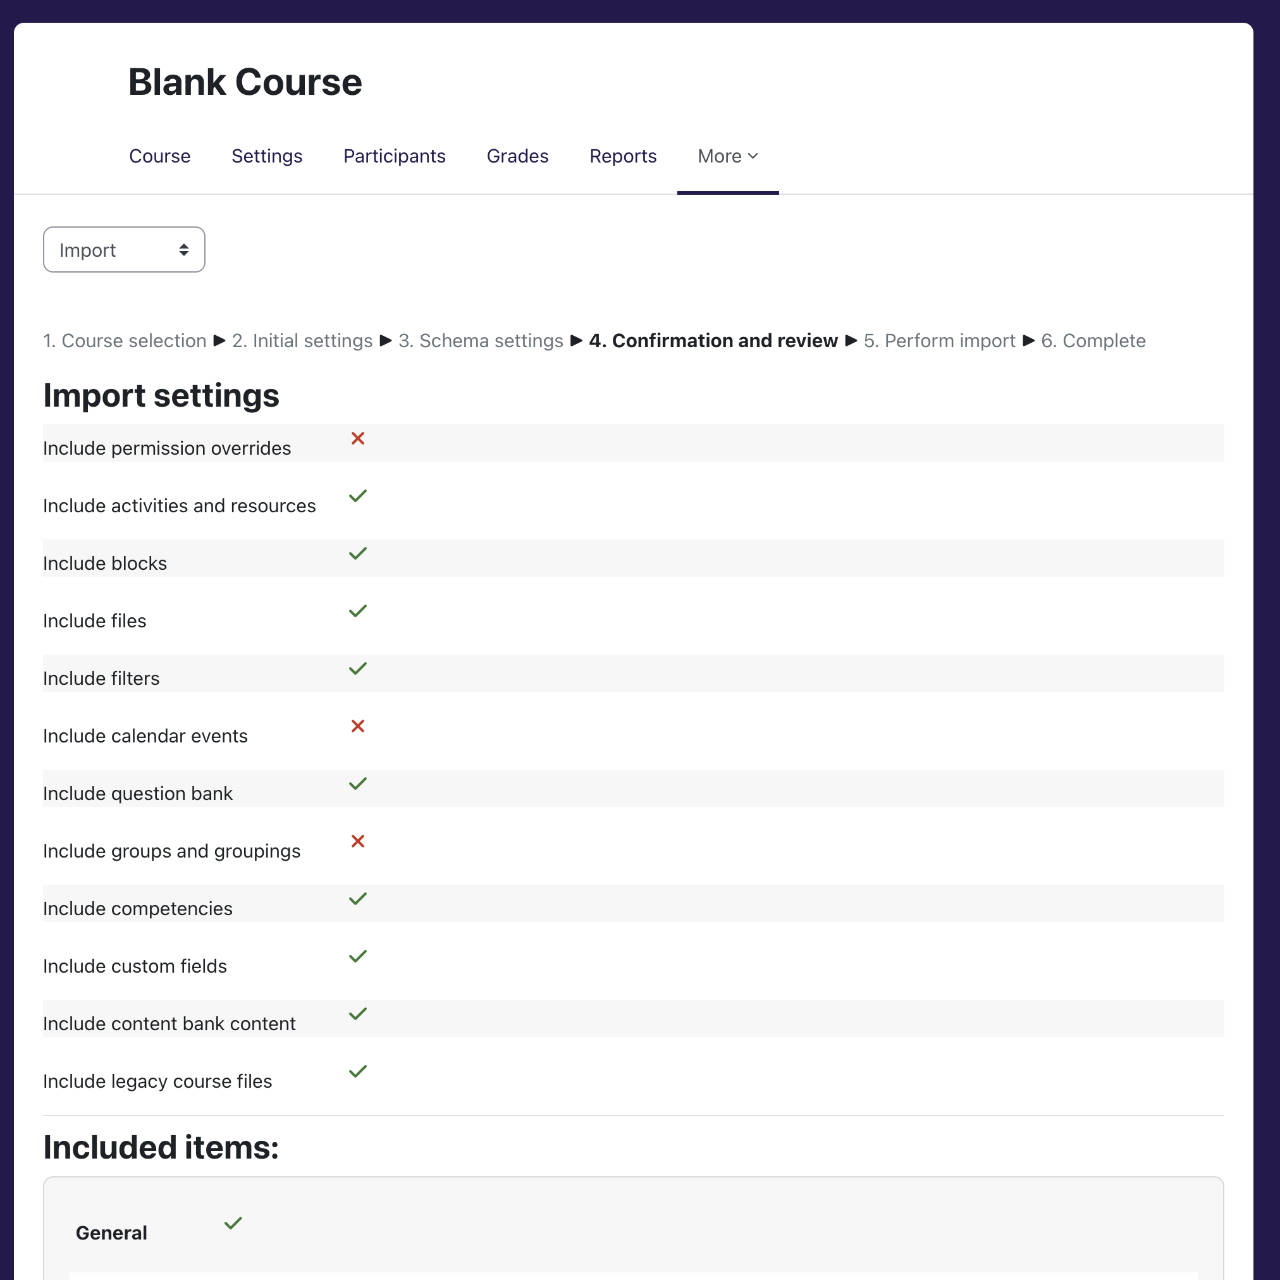
- In the Confirmation and Review page, check your settings then click Previous at the bottom to go back and change your settings or click Perform import
- Wait for import to finish then click Continue
- You will go back to the course page where you will find the imported content
You might find that you have a redundant “Announcements” forum in your new course. You can safely delete this activity.
For those who previous the steps laid out visually, here it is again:
1. Access your new blank course
2. From the Course navigation: click More > Course Reuse
3. In Find a course to import data from… pick from the list or Search for the course, Select it then click Continue. Note that you can only import from courses where you are are teacher.
4. In the initial settings page, uncheck what you don’t need then click Next. In our case, we don’t need the calendar events and groups and groupings.
5. In the Schema settings page, uncheck any resources or activities you do not need or click Select: None then click what you need then click Next at the bottom of the page when ready.
6. In the Confirmation and Review page, check your settings then click Previous at the bottom to go back and change your settings or click Perform import. If you have a big existing course to import from, this step may take a while.
7. Wait for import to finish then click Continue
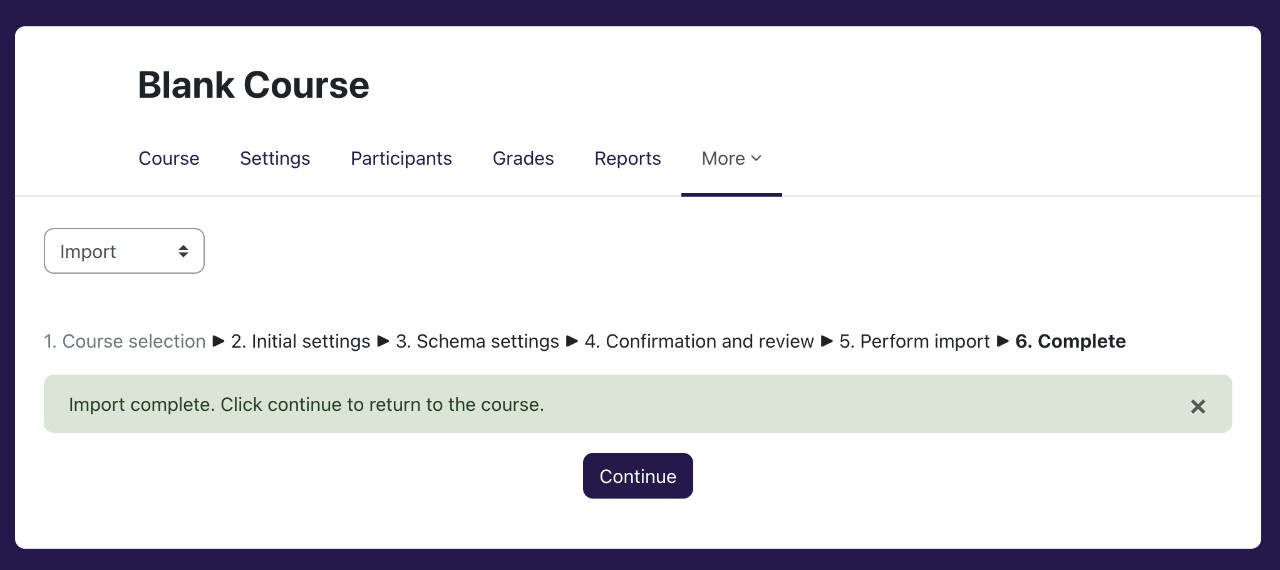
This takes you back to the course page where you will find the imported content
This also concludes the clone or copy a course tutorial.


