How to Add A Custom Message to Dashboard on Moodle
The dashboard is the default homepage and we love it. It makes it much easier and user oriented, allowing users to login and quickly access the courses they recently accessed or the courses that they are enrolled in. That and the navigation drawer (the left collapsible sidebar) works together to allow users to access all their courses. BUT what if you wish to add a custom message, post an announcement or to advertise a new course. Here’s how.
Changing the Default Home Page for Users
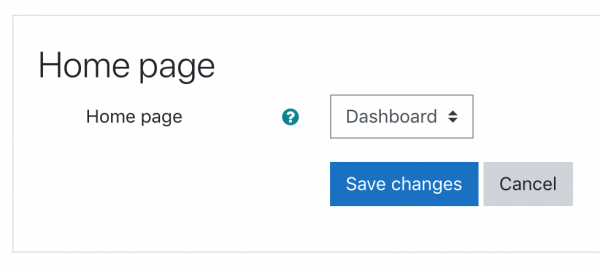
You can of course change this if you do not want the Dashboard as your default home page by going to Administration > Site Administration > Appearance > Navigation
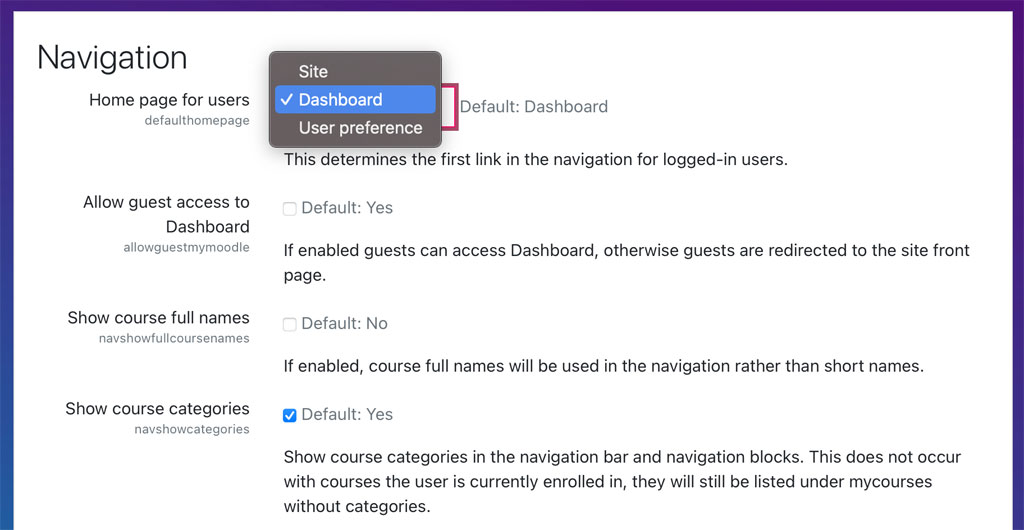
Your options are, Site (more commonly known as the site’s front page), Dashboard and User preference. Once set, remember to save changes. Choosing User preference lets the user decide which is to be the default home page be it Site home or Dashboard. They can choose this under User menu > Preferences > User account > Home page (see image below).
Changing & Customising the Default Dashboard
Now if we are set on using the Dashboard as the default home page, some of you might be wondering how does one add custom blocks, labels and messages.
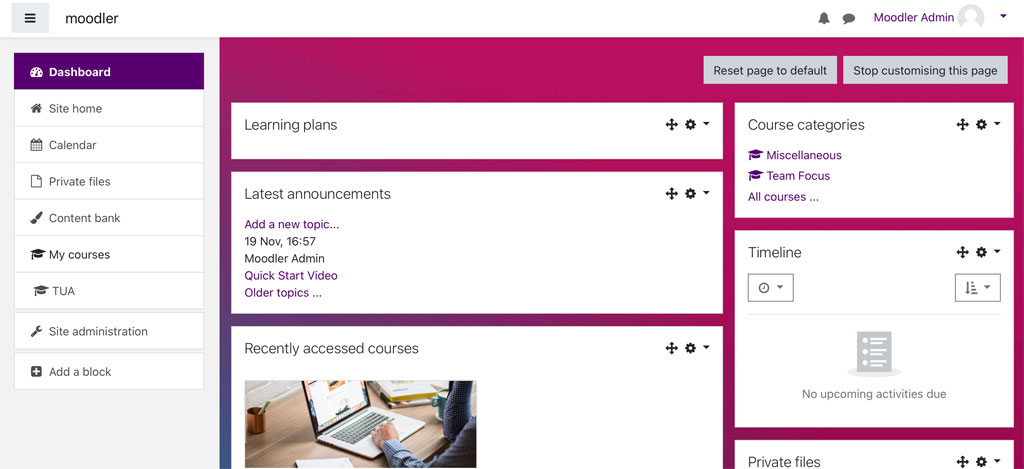
Customising the Site home page is as easy as customising your course page, adding activities and resources. But changing the Dashboard for everyone is a little trickier. While the dashboard is user customisable, the default Dashboard can be customised by the administrator and set for everyone.
Most administrator make the mistake of customising their own dashboard using the “Customise this page” button on the top right and expecting this to ripple through to everyone automatically. This only customises your personal dashboard, nothing else.
Step-by-Step to Customising the Default Dashboard
The only way to change the Dashboard for everyone is to use the following steps:
Site Administration > Appearance > Default Dashboard page
Here is where you start editing by turning the Blocks editing on (top right corner button)
You can proceed to add or remove blocks and move them around to suit you.
Note that it is okay to Delete blocks. This will not remove the blocks forever, merely removing them from view.
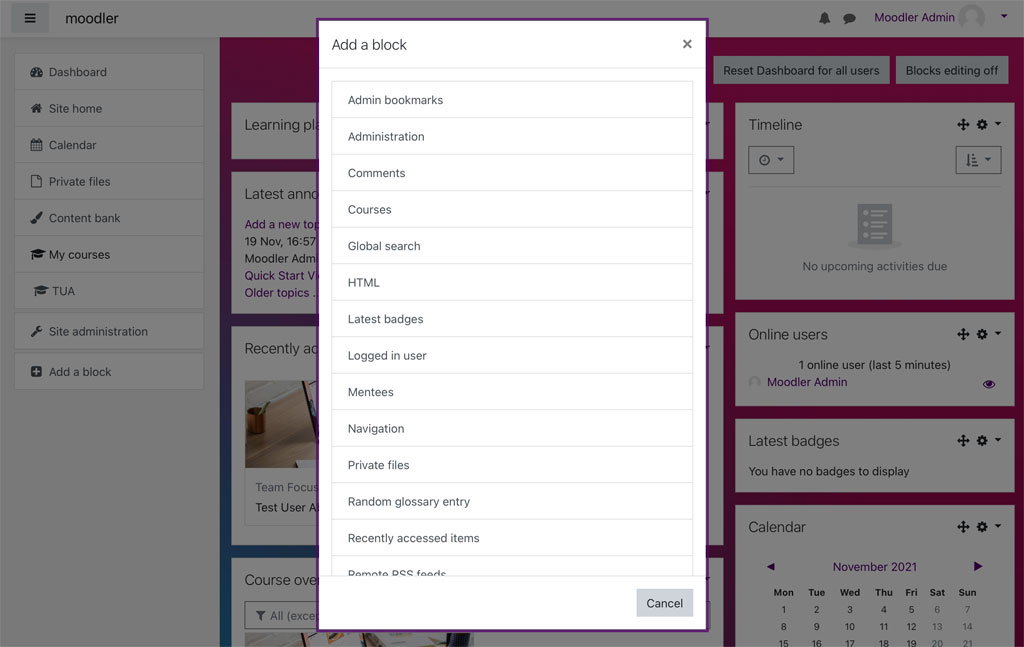
You can re-add them by going to Add a block in the Navigation Drawer (left sidebar).
If you have just removed a block and can’t see it in the Add a block pop-up, you may need to turn Blocks editing off and on again.
When you are done, remember to click on Blocks editing off to save changes.
Publishing the Changes
In order to make your changes available to all users, you then need to click on Reset Dashboard for all users. If you don’t click on this button, the changes will not be published to the users.
IMPORTANT: When you click on Reset Dashboard for all users, this removes all user customised changes to their Dashboard.

Adding a Custom Message to the Dashboard for All Users
Now that you know how to customise and change the default Dashboard for all users, it’s time to look at how to add a custom message. Typical scenarios where this would be useful include:
- Introducing the Moodle learning environment by adding a welcome message
- Adding announcements regarding scheduled maintenance work on the server
- Getting learners to watch an introductory video or how-to tutorial video to get started
- Publicising an event such as online webinar, in-person seminar or workshops
- Advertising a new course or courses to students and tell them how to sign up
- You may have other reasons for adding a custom message to the dashboard, share them with us by leaving a reply below.
Step-by-Step to Adding a Message to Users’ Dashboard
The steps are similar to customising the default dashboard:
First login to Moodle as administrator
Go to Site Administration > Appearance > Default Dashboard page
Here click on the Blocks editing on button (top right corner).
You can proceed to add a HTML block. Click Add a block from the bottom of the Navigation Drawer (left side bar).
From the Add a block pop-up choose HTML to add a HTML block
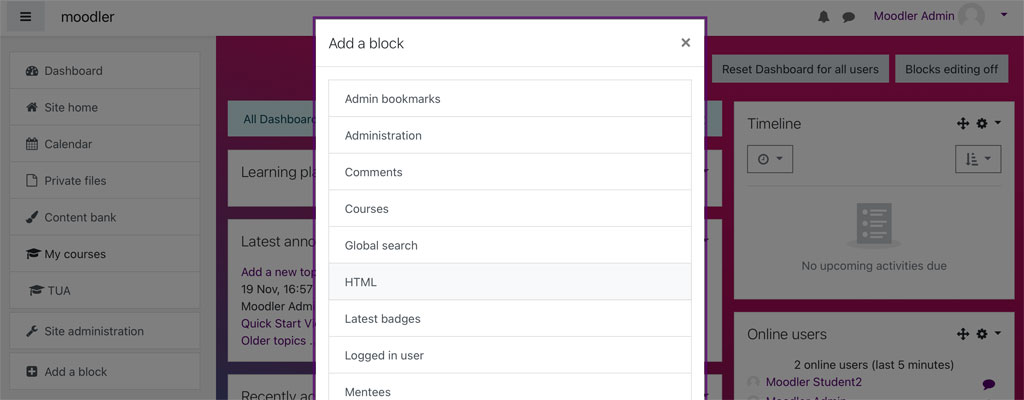
Once added, move the HTML block to the middle section by clicking on the four way arrow and dragging it across to the middle column.

Now that we got it to top centre, its time to add your message, click on the Gear button and choose Configure new HTML block from the drop down menu.
In the Configure a (new HTML block) block page, add your custom message to the HTML block title and Content then click Save changes when ready.
You will then return to the default Dashboard page. Here, click Blocks editing off button (top right) to save changes
To publish your custom message to all users, click Reset Dashboard for all users. As before, note that all the custom changes applied by users will be reset.
Update your Custom Message on the Users Dashboard
To update the message, follow the steps above to go to Default Dashboard page.
Click Blocks editing on button then Gear icon > Configure (HTML block) . Note that this may be called the title of your HTML block previously added.
Make your edits in the title and content field then click Save changes.
Again, to ensure that changes to the Default Dashboard page is ‘published’, click on the Reset Dashboard for all users button.
Your learners can then login to see the message on their Dashboard.
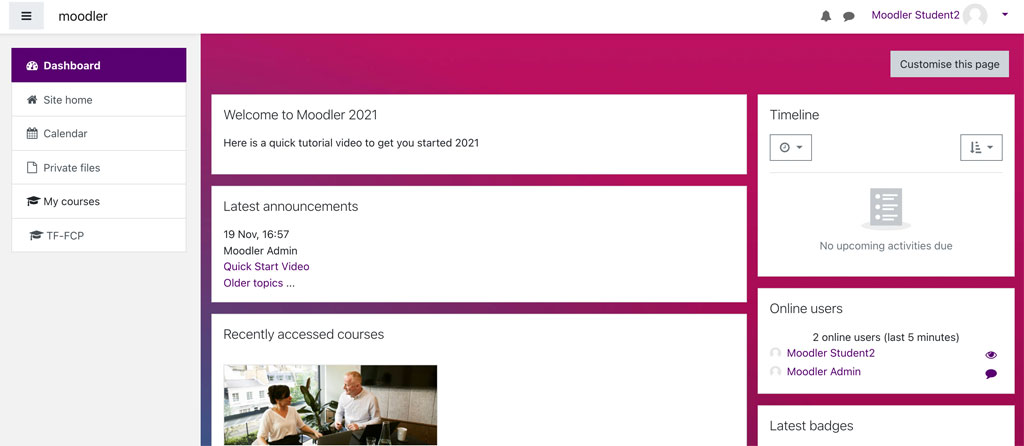
End of tutorial
