How to use Advanced Grading – Custom Marking Guide (Mark Scheme) for Assignment in Moodle
How to apply your own mark scheme in Moodle, so graders or markers as well as students know what to look and aim for? Here’s how to set a custom marking guide for assignment in Moodle so you can apply advanced grading for the work you set.
Marking Guide for Assignment in Moodle
Sometimes known as grading guide, mark scheme or grading criteria; Marking guide are used by education establishments to assess a paper based on a fixed set of criteria. Moodle lets you add your own Marking guide including support for student view, teachers view, teachers feedback and grade per criteria as well as final feedback.
Marking guide is available as a Grading method for an assignment activity in Moodle, so make sure you are looking in the right place.
Here are the benefits of implementing your custom marking guide:
- Consistency in Grading: Ensures uniformity in evaluation criteria across different graders, reducing subjectivity via Grader / Teacher view
- Clarity for Students: Provides clear expectations and guidelines, helping students understand how their work will be assessed via Student view
- Efficiency: Speeds up the grading process by providing a structured format for evaluators to follow with maximum grade set for each criteria
- Feedback Quality: Facilitates detailed and structured feedback, enhancing learning outcomes for students with feedback per criteria
- Transparency: Increases transparency in the grading process, making it easier for students to understand their scores with full grade report.
- Reduced Disputes: Minimizes grading disputes and appeals by providing a clear rationale for grades awarded.
- Support for Multiple Graders: Simplifies coordination among multiple graders, ensuring they follow the same assessment criteria.
- Customization: Allows for tailored marking guides to fit specific assignments or projects, enhancing relevance and effectiveness.
- Record Keeping: Provides a documented trail of the grading process, useful for accreditation and quality assurance purposes.
How to create a Marking Guide
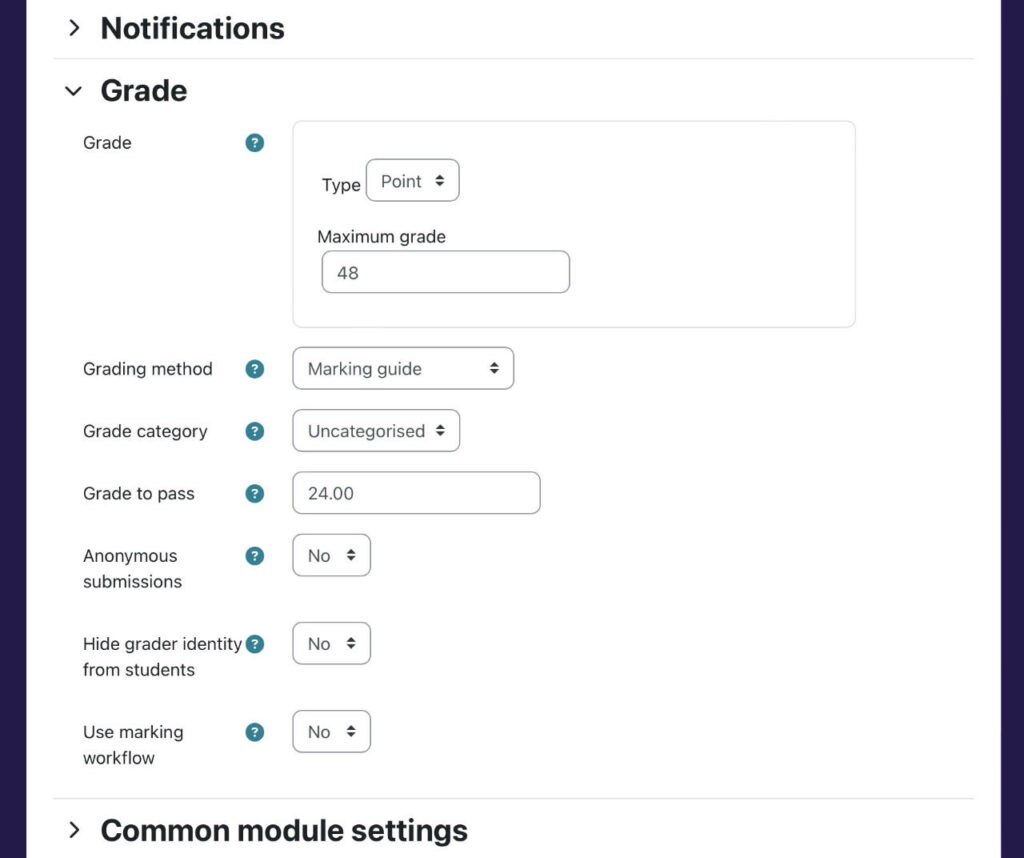
You must first create an assignment then select Marking guide as the Grading method under Grade. Here are the steps:
- Login as a teacher with editing rights on Moodle, then go to your Course
- Turn edit mode on and create an assignment via (+) Add an activity or resource > Assignment
- Fill in the assignment settings, where applicable. Scroll down to Grade and click to expand the accordion tab (see above)
- Set the following: Grade type as Point and enter Maximum grade, Grading method as Marking Guide from drop down menu and set the maximum grade to be awarded.
- Remember also to set Grade to pass. When ready scroll down to the bottom and click Save and display
Other settings you may consider:
- Anonymous submissions: hides the identity of the student from the marker if set to Yes.
- Hide grader identity from students: if set to Yes, students can’t see who marked their work.
- Use marking workflow: select Yes if more than one person to mark. Also to control release of grades.
- Use marking allocation: select Yes if assigning markers to students
Define new grading form for Marking Guide
When you create Marking Guide for the first time alongside creating an assignment above, upon clicking Save and display, you will be sent to Advanced grading page. Click Define new grading form from scratch button.
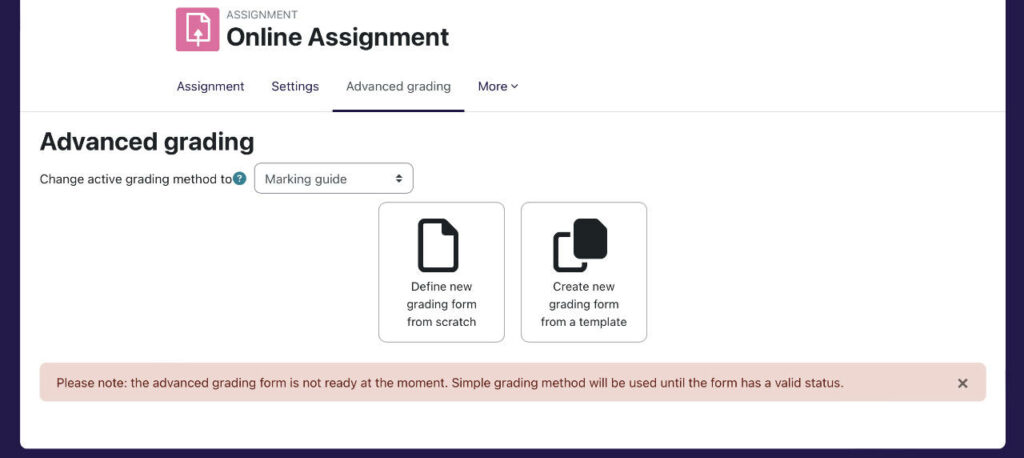
- Following from Save and display assignment above, you will be sent to the Advanced grading page, click Define new grading form from scratch.
- If this does not show, go to Course page and turn edit mode on.
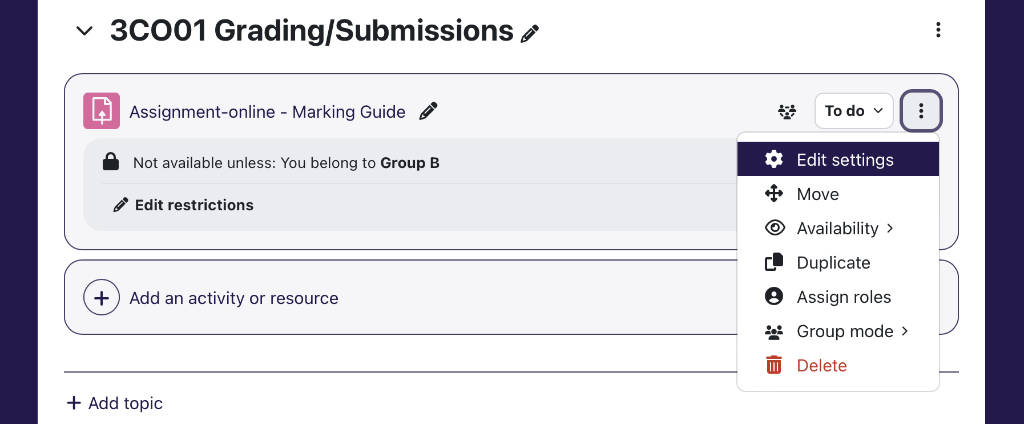
- Scroll to the assignment and click Edit Settings from the drop down context menu (see image below). In the settings page, click Advanced grading in the top menu bar. There you can click Define new grading form from scratch.
The Settings in Marking grade Demystified
You don’t call it Advanced Grading for nothing. There you will find marking guide options that may need some explaining due to the terminologies used.
From the steps above, you would have gotten to the Marking guide settings page for your Assignment (image below). Give the Marking grade a name and description (optional). Here is where you apply your custom mark scheme. To do this you need to create criterions and for each criterion, the following information:
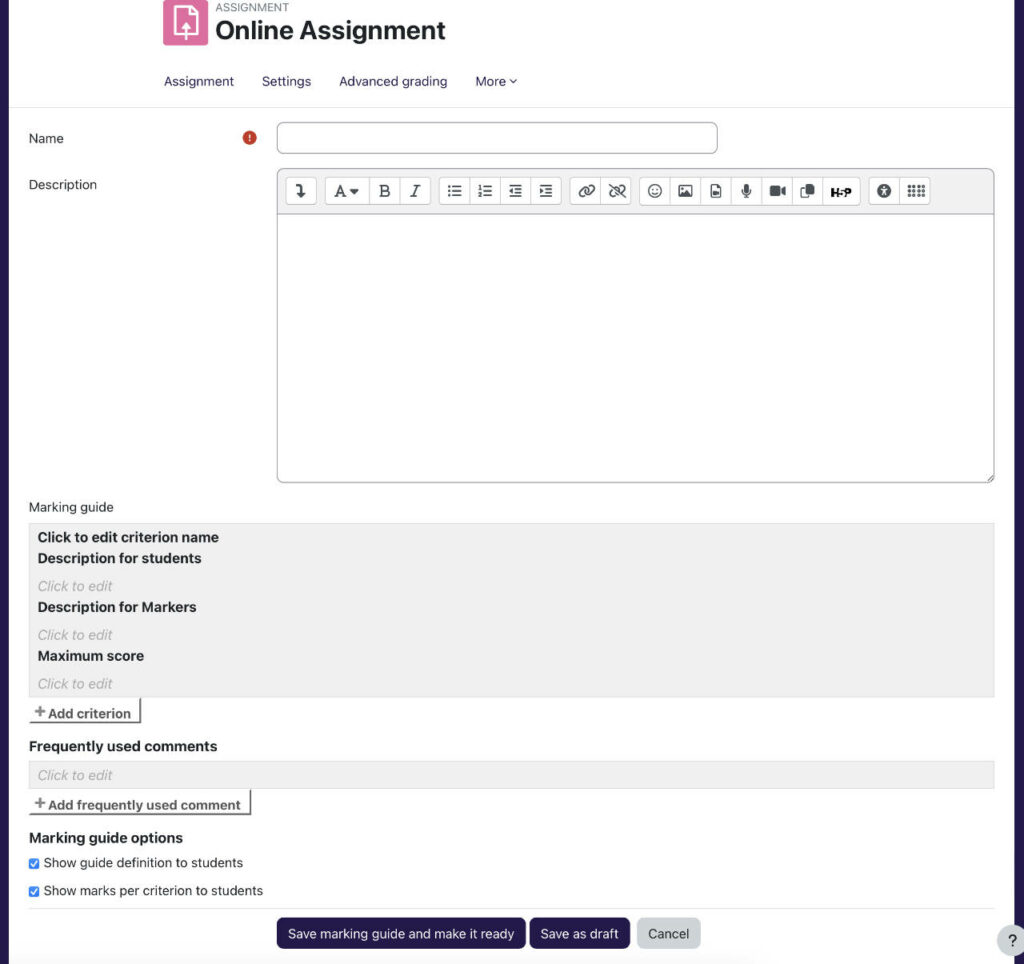
- Edit criterion name – name
- Description for Students – info for students to let them know what is required, e.g. number of facts and examples
- Description for Markers – info for markers to tell them what to look for and how to mark, e.g. accept facts and relevant examples only
- Maximum mark – to set the maximum mark for this criterion
The other settings that we find really useful are the Frequently used comments bank. Here you can add comments act markers can use especially when teachers work as a team to mark the papers. Example of canned comments:
- You have not included any fact or example (0)
- You have included one fact and one example (1)
- You have included two facts and two examples (2)
- You have included three facts and three examples (3)
Use the +Add frequently used comment button to add more or click on existing comments to edit. Click the up or down arrows to reorder your list (see image below).
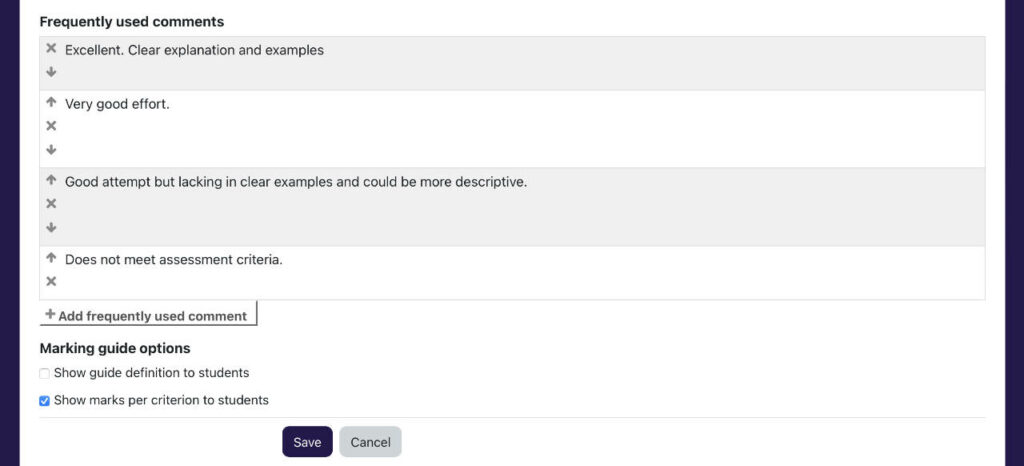
The last two checkboxes are options to allow students to view or not, the guide definition and the maximum mark that can be awarded per criteria.
Once completed, click on Save marking guide and make it ready or if you wish to save your progress, click Save as draft.
How to Use the custom Marking guide
To use the custom Marking guide you have just created, login as teacher with editing right, go to the course and click on the Assignment where you have just created. Click on the Grade button and you will see your Marking guide. Here, you can:
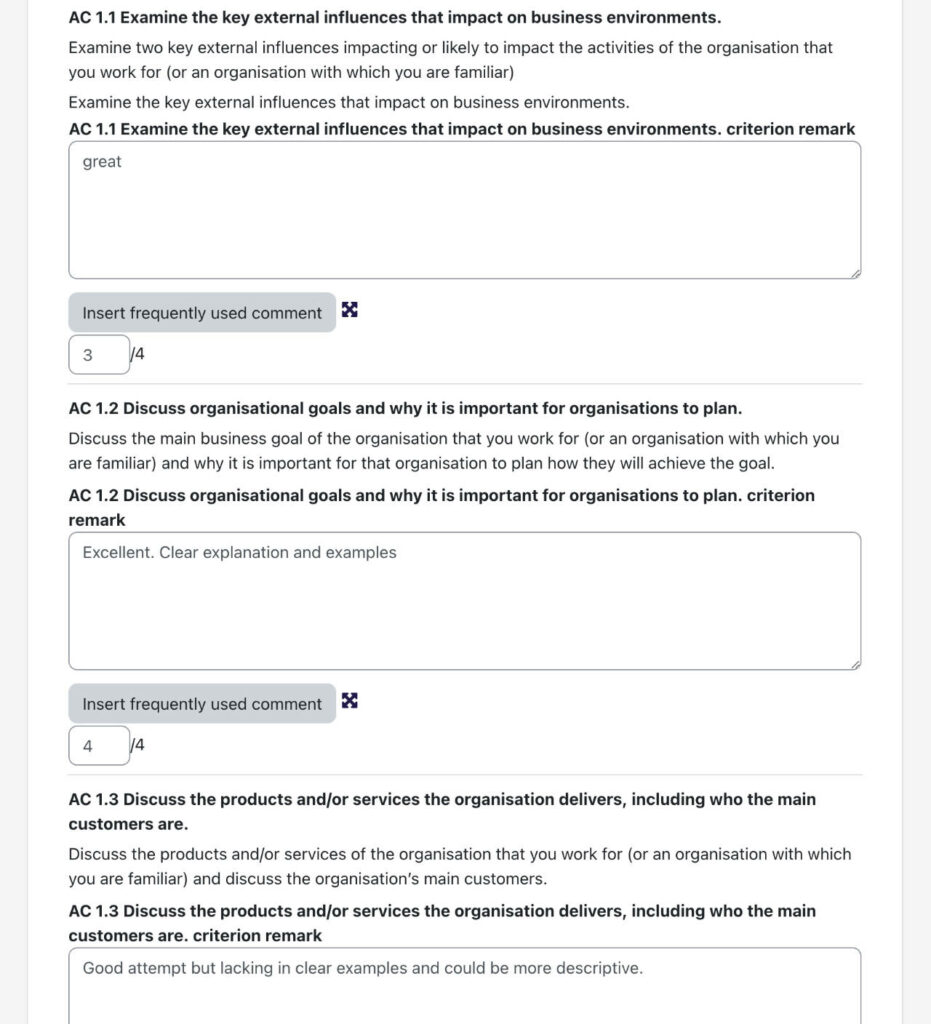
- Add criterion remarks manually
- Insert frequently used comments
- Add grades for each criterion (see Marking guide in action below)
- Set marking workflow state from Not marked to Marking completed or other options
- Allocate a Market
- Add final Feedback comments
- Upload Feedback files
- and learn about the number of attempts
